Nothing transforms a room or a home like a fresh coat of paint. And nothing is more upsetting than discovering issues with a new paint job.

In this post, I’ll discuss some paint problems you may encounter and how to remedy them. I’ll break this down into interior and exterior issues and will have you painting like a pro to correct these problems.
Interior Wall Paint Issues
Water stains
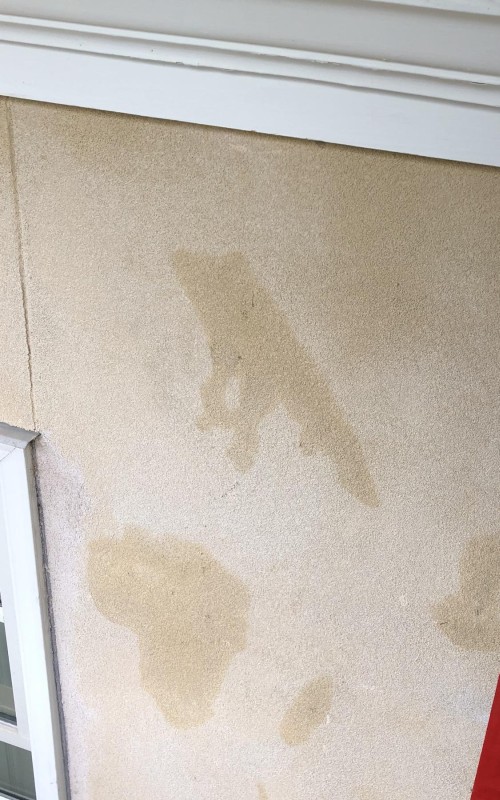
Water stains typically show up on ceilings or walls and range in size from a quarter to something resembling a crime scene outline! No matter the size, you’ll need to:
- Repair the leak. This search may require a handyman or contractor to zero in on where the issue is. Remember: it doesn’t take a big gap for stormwater to enter and do a lot of damage. Often, it’s an easy fix with caulk.
- Patch. This is only necessary if the paint or drywall has bubbled. You may need to apply several coats of spackling, while severe cases will require razor blading out drywall tape or small sections of sheetrock. If this is beyond your expertise, contact a handyman or drywall pro to assist.
- Prime the water stain with an oil-based primer. I prefer Covers Up spray primer by Zinsser since it’s designed to spray up at the ceiling. In many cases, it matches the existing paint color.
- Paint patch with matching color. This is where it can get tricky as there isn’t a universal ceiling white. Unless you know the brand of ceiling paint used as well as the color, you may have to paint the entire ceiling to make it match. However, if you removed some drywall to repair it, you can take it to your local paint store to have it matched.
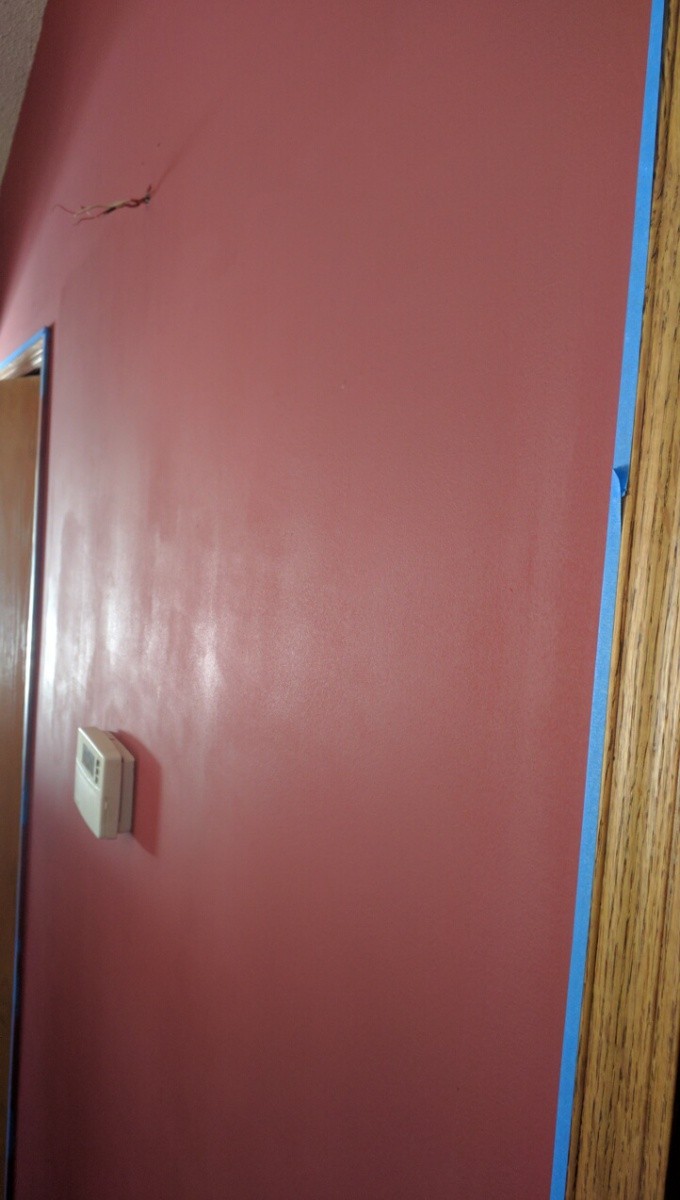
Sharpie and other art pens on the wall
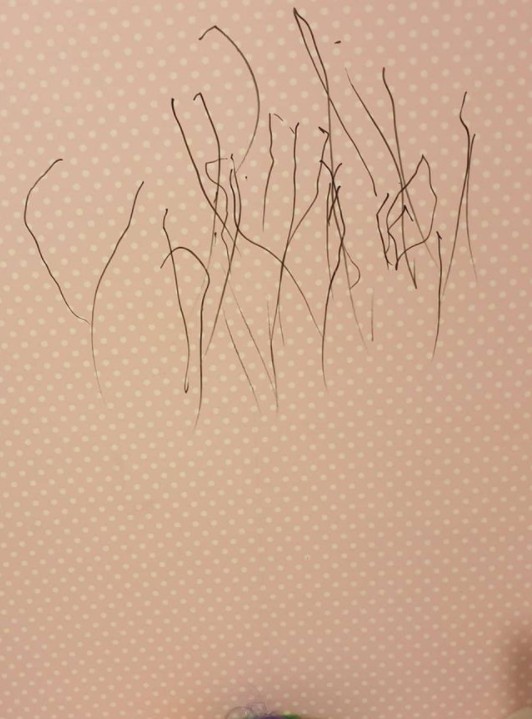
I know what you’re thinking: “Who would write on a wall with a Sharpie or Crayon?” Trust me! I’ve seen my share of rooms where kids used Sharpies and other pens to, “express themselves.”
Some markers can be painted over, but others, like water stains, bleed through no matter how many coats are applied. Here’s how to address this issue.
- Prime the bleed-through with an oil spray primer. I prefer products that allow you to topcoat in 60-30 minutes for a faster turnaround.
- Paint the primed area. For the best results, use a small 6” roller and blend the color into the existing paint to avoid sheen flashing as good as possible. If you’re the type that wants the sheen to be uniform, you may need to paint the wall from corner to corner.
Inconsistent Sheen
This issue is most visible on a sunny day and when viewing the wall from an angle. Inconsistent sheen is when the cut in (by brush) gets a 2nd coat from roller overlap while the rest of the wall only received 1 coat of paint.
I see this in homes where the owner or painter used a “primer and paint in one” product that guarantees coverage in 1 coat.
But here’s the truth: although the color may cover in 1 coat, to get the sheen uniform, you always need 2 coats. The only way to eliminate this problem is as follows:
Apply a second coat. Yes, it is time-consuming to paint an entire wall or room, but in the end, you’ll have walls with equal brilliance that are stunningly beautiful.
Drips and Blemishes
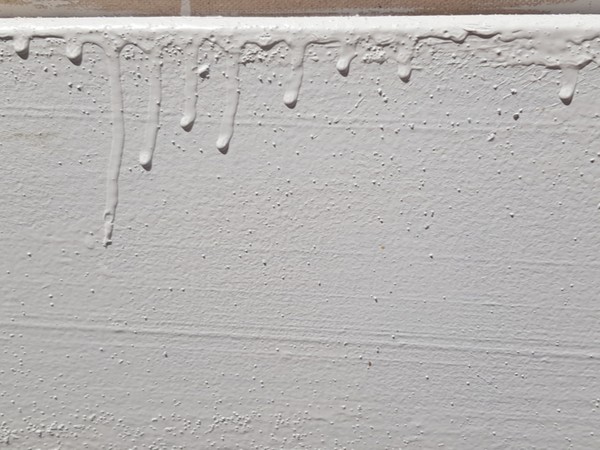
Like water stains, these come in every size and shape. Drips can be a single tear-shaped mark or can be a large area where the paint sagged and looks like melted candle wax.
Also, the shinier your walls are the more apparent these will be, which is one reason new homes use flat paint to hide as many imperfections as possible.
Tape lines, used for faux finishes like striping or creating geometric patterns, can sometimes be seen. With that all being said, here’s what can be done to fix these pesky problems.
- Sand. For the small drips, use a putty knife to scrape off the drip, followed by a light sanding with a sanding square. For bigger, areas like sags or faux tape lines, I recommend an orbital sander with 220 grit to knock these down. If you still feel the blemishes after sanding, use a lower grit but be careful not to cut into the sheetrock.
- Patch. If you have some pitting or gouges, patch with spackling to get them even with the rest of the wall.
- Prime. If you patched, then you’ll need to lightly sand and prime. If you didn’t patch, then skip priming.
- Paint. Using a 6” roller, blend the paint into the existing paint. Several coats may be needed to get the sheen balanced. If the sheen flashes too much, you will need to repaint the entire wall.
Latex on oil
This can be tricky to spot and a nightmare to remedy. This issue is found commonly on trim painted with oil paint and then accidentally re-coated with latex paint.
The latex will cover the oil but will not adhere to it, so it can be scraped off with a fingernail or putty knife. As you can now guess, here’s why fixing this issue is a nightmare.
One has to assume that if one area has been painted with latex over oil, then the remaining trim has also. Test other areas to see if this is indeed the case and once that’s determined, decide if you’ll correct everything or address as the issues arise. Here are the steps to remedy this problem on a door:
- Scrape and sand. Putty knives are great for this as are orbital sanders with 220 grit. You’ll need to get as much of the latex paint off as possible and be sure to have a shop vac handy as this is a messy job. Sometimes the latex will stick to sections of the trim. If this is the case, leave as is and sand the edges until they’re smooth and won’t be visible when you apply paint.
- Repaint. Now that the entire door and frame are sanded and free of loose latex, you can repaint with quality latex paint. To skip priming an oil primer or high-bonding latex primer, I recommend using Pro Classic (Sherwin Williams) or Advance (Benjamin Moore), or Advantage 900 (PPG) that are designed to adhere to the oil without priming. Each product is unique so be sure to read the product literature to understand how they work and how to apply.
Exterior Wall Paint Issues
Now that we’ve addressed some problems found on the inside of your home, let’s step outside and look at some issues there.
As you can imagine, your home takes a beating from the weather and the sun. Here are some common paint problems you may encounter.
Sap bleed
This is most noticeable on white trim or beadboard and the sap looks like coffee stains or rings. The biggest culprits are knots and sap bleed can also appear on interior trim. Either way, the remedy is the same for both. Here’s how to get rid of these unsightly blemishes.
- Prime. You’ll need a shellac-based primer; it’s the only type that will effectively seal the tannins and allow your topcoat to cover completely. Depending on your expertise as well as the location of your stains, spray cans are your best choice. If you’re afraid of over spray, then you’ll need a quart and brush it on.
- Several coats. One coat of primer should do the job, but other contractors recommend several coats of primer.
- Topcoat. Once the primer is dry, you’re ready to re-paint the area using top-quality exterior latex paint. If you repaired sap bleed on your interior trim, then use a high-quality interior latex product.
Blistering
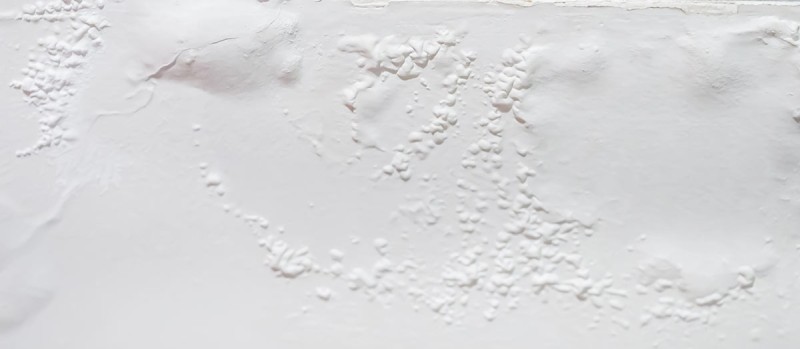
As the name implies, blistering is when tiny bubbles appear under the paint and are most associated with wood substrates.
Blistering is the result of moisture coming up from the wood and getting trapped behind the paint or water penetrating the paint because it was of poor quality. Here’s how to fix blistering:
- Scrape and sand. With a putty knife and sanding square (or electric sander), remove the bubbles. Sand the surface smooth so that the blisters won’t show through the paint.
- Prime. Wait until the wall and the area is completely dry but don’t apply in direct sunlight. A quality exterior latex primer will suffice for this.
- Paint. Again, apply when the area is dry, avoid direct sunlight, and when rain isn’t in the forecast.
Peeling paint

This issue is the result of either the paint not adhering properly or moisture issues.
Signs that the peeling is a result of poor adhesion are:
- Peeling paint reveals other paint colors and not wood.
- Areas that peel are small; not big sheets.
Indications that moisture is the culprit of peeling are:
- Peeling paint reveals wood.
- Large sections peel off.
- Usually occurs around gutters and windows.
If you think your problem is adhesion-related, you will need to:
- Scrape off all loose paint. When you scrape, continue until the paint no longer peels off. Don’t panic if you’ve created a larger area to repair; it’s best to get all the non-adhering paint off in order to repair this once and not have to deal with it down the road.
- Sand. Use a sanding square to clean and smooth the surface and the edge where the paint that still adheres begins.
- Prime. A good quality, latex exterior primer will do the job.
- Paint. Apply high-quality exterior paint onto the repaired area.
If you think water is the reason the paint is peeling, follow these steps:
- Find & fix the problem. If the issue is overflowing gutters or leaky gutters, have them repaired and make sure they are draining properly. For other areas of your home, you may need to add an exhaust fan or soffit vents to help with the moisture issue.
- Scrape off loose paint. Again, you may create a bigger problem to repair, but it’s a necessary step in fixing the problem.
- Sand and caulk. Use a sanding square to smooth the paint edges and the exposed wood. You may need to caulk seams or remove aged caulk. Also, make sure the exposed wood is solid and doesn’t have rot or need wood putty or worse, need replacing.
- Prime. Use a high-quality exterior latex primer on the exposed wood.
- Paint. Apply 1-2 coats of top-tier latex exterior paint.
I hope this has given you the confidence to tackle these issues and any others that may arise as a homeowner or contractor.
Related Posts
- How Much Does it Cost to Furnish a House – Living Room,Bedroom,Kitchen etc
- Staples of Building a Cosy Family Home
- 10 Virtual House Painter Visualizer Apps (For Interiors/Exteriors)
- Best Sliding Door Types and Brands According to Reddit Users
- Sliding Patio Doors vs. French Doors: Choosing the Best Option for Your Home
- How to Protect Sliding Glass Doors from Burglars: Essential Security Tips
Leave a Reply