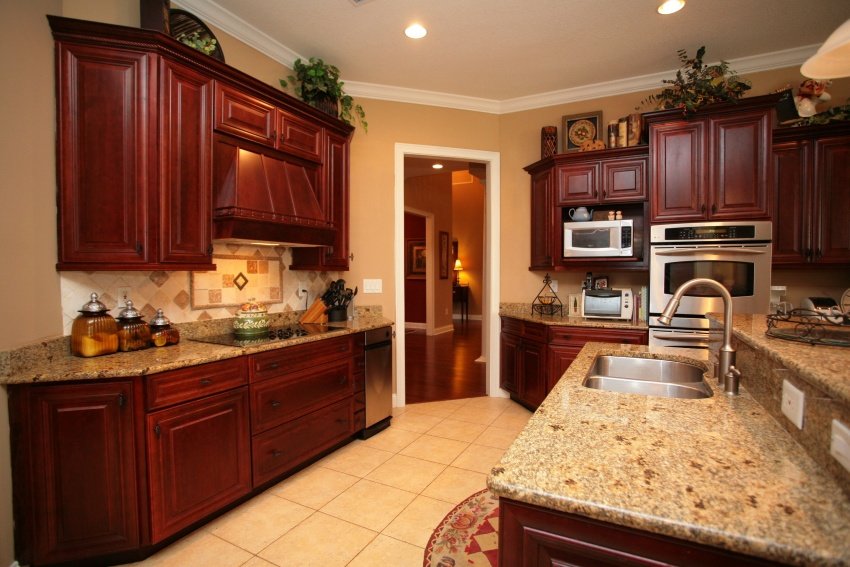
It is no secret that the kitchen is a vital part of any home. Many home owners spend a fortune renovating their kitchen in order to create their ideal look. However, there are more affordable methods of revamping your kitchen and you can start with cabinet renovation which can give a fresh look to the whole kitchen design.
Creating your dream kitchen doesn’t have to break the bank.
Below we will see three common methods of revamping your kitchen cabinets with instructions and guidelines for each method. These are cabinet painting, staining and re-facing.
Kitchen Cabinet Painting
You will need the following tools and materials:
- Painters Tape
- Degreaser/TSP Substitute
- 100-grit sanding block
- Air Compressor/Vacuum
- Fan
- Primer-sealer
- Paint
This method is by far the most highly recommended. When done properly, it will make the most drastic impact out of all other methods and will correct any countertop problems that were created over the years (for example by cleaning the surface with inappropriate methods).
However, it is very tedious due to the importance of preparing the cabinetry for paint. In order for the paint to adhere properly and evenly to the wood, you must follow these steps carefully and thoroughly.
Step1:
First, remove all cabinet doors and drawers that are going to be painted. Also remove any hardware. This includes any latches, knobs, or pulls that may get in the way. Unless you plan to replace the hardware, I recommend placing the pieces in plastic baggies numbered to match the door/drawer it corresponds to. This also means numbering the cabinets. Use painters tape for the numbers.
Step2:
Next, you must clean the cabinets. They may not appear to be very dirty, but everyday cooking can often leave a slight residue on surrounding cabinetry and furniture. This step is very important. Grease and grime can have a huge impact on the way your paint adheres to the wood. Use a degreaser or TSP substitute and go over the cabinets several times (unless you are using chalk or milk paint).
Step3:
After the cabinets are degreased, sand with 100-grit sanding block. This will allow the paint to stick to the wood. Most cabinets have a finish that will make painting difficult, so this step is also very important.
It is best to use a wood sanding block to prevent rounding any existing carved edges on the cabinet face. However, if you have a simple or flat door style, using a sander might be your best bet. Also, remember you do not need to sand away all the old paint or stain. Just be sure the surface of the cabinet is rough enough to hold the new layer of paint.
Step4:
After you’ve evenly sanded the cabinetry, be sure to do away with all the sanding dust from the cabinets and surrounding area. It only takes a small amount settled into the paint to tarnish your hard work with unsightly blemishes. I recommend using an air compressor to ensure all the dust has been removed from the space.
Step5:
Before beginning this next step, be sure that you are in a well-ventilated area. If you are indoors, open a window near you and set up a fan if possible. Also, make sure that all nearby valuables are covered or moved away. When you’ve taken these measures, you’ll be ready to apply a coat of primer-sealer to the doors and drawer fronts.
Step6:
After applying the primer, you are ready to apply the paint! Here are some tips for this step:
- Start with the inside edges, then the outside edges, and then the actual face of the doors and drawers.
- Be careful not to let paint accumulate in any crevices.
- Apply paint scarcely rather than in large amounts. It is better to apply additional coats than to find drip marks later on.
- Don’t overwork the brush. It can leave air bubbles in the finish.
- Let paint dry for 4-5 hours between coats. Patience is the key here. At least two coats are recommended due to the nature of kitchen cabinet use. The more durable the finish, the better.
Here is a video with some more tips and instructions for painting your kitchen cabinets:
Kitchen Cabinet Staining
You will need the following tools and materials:
- 100-grit sandpaper
- 180-grit sandpaper
- 220-grit sandpaper
- 50/50 mix of wood conditioner and denatured alcohol
- 000 Steel Wool
- Tack Cloth
- Soft Rag/Brush
- Stain
- Polyurethane
This method is similar to painting, but there are critical differences. Sanding is much more important in this step because there won’t be any primer to hide remnants of old finishes beneath the new stain. Any imperfections will show through, so be sure to keep that in mind if you choose to use this method.
Step1:
Follow steps 1-3 of painting instructions.
Step2:
Instead of stowing away your sander after you’ve done your first pass with the 100-grit, switch to a 180-grit sandpaper and give it another go around. After that, switch to 220-grit and do it once more. This is vital for preparing the cabinets for the stain.
Step3:
Apply a 50/50 mixture of wood conditioner and denatured alcohol. This is similar to a primer, but it is more of a light coating to help the finish go on more smoothly. After allowing the coat of your mixture to dry, rub the surface with 000 Steel Wool, and wipe down the surface with a tack cloth.
Step4:
Apply stain of choice using a soft rag or a brush, whichever gives it a more even-toned finish. Once the first coat of stain has dried, use the steel wool once again and rub very lightly over the stain. Clean with tack cloth. If you want a fuller stain, apply additional coats until you are happy with the color.
Step5:
Finally, in a dust-free area, apply a coat of polyurethane to give your stain a protective glossy coating.
Check out this step-by-step guide with pictures of staining wood cabinets.
Also, the video below shows how to re-purpose kitchen cabinets using Java Gel Stain.
Kitchen Cabinet Refacing
This method is slightly more costly than the previous two methods, but it takes a bit less time and ensures that your cabinets will be exactly what you want.
The idea of cabinet re-facing is replacing only the doors and drawer fronts, while simply covering the remaining exposed cabinetry with skins or laminated panels.
It takes a bit of odd measuring to get accurate door and drawer dimensions for your cabinetry, especially if your cabinets are older. The best way to do this is to visit your local hardware store or go online with your door and drawer measurements to receive a quote.
When you find something that fits your style and budget, you simply have to order the product. If you want to paint or stain the doors and drawers yourself, most re-facing manufacturers offer unfinished doors and drawer fronts for your customizing pleasure.
Summary
Cabinetry may be one of the most expensive things you can buy for the interior of your home. However, there are alternative methods to replacing them such as painting, staining and refacing, as explained in this article. Hopefully you find one of these methods fits your interests. Happy Designing!
Related Posts
- 11 Ways to Get Rid of Cooking Smells in a Small Apartment or House
- Comparison of Corian Countertops vs Laminate for Kitchens
- All About Fragranite Kitchen Sinks With Pros & Cons
- Comparison of Granite Composite Sink vs Stainless Steel
- How Much Does it Cost to Paint Kitchen Cabinets?
- What Color Granite Goes With Maple Wood Kitchen Cabinets?
I liked that you said that making sure that your kitchen cabinets are refinished properly will help to create a drastic change in your space, minimizing other imperfections in the room. I have been thinking about hiring a professional to refinish the kitchen cabinets that I have in my home in order to revamp the appearance of that space but I have been worried about the cost. I will be sure to look for a reputable professional that will work with my budget so that I can achieve cabinetry refinishing in my home that is done correctly.