It’s a question many homeowners ask: “can you paint aluminum siding?” The quick answer is yes. But first, let’s examine why you may want to consider this undertaking.
There are several types of house siding material and Aluminum is one of the top choices for residential homes.
Here are some of the main reasons for having to paint the aluminum siding of your property:
Pros of Painting Aluminum Siding
Curb Appeal
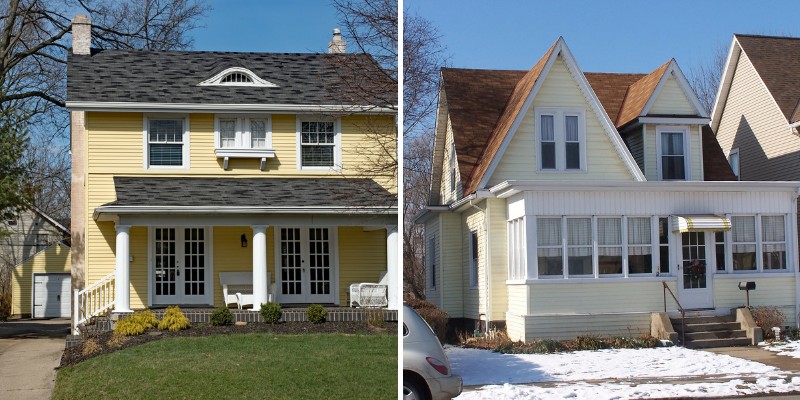
Maybe you’ve lived in your home for years, and you’ve noticed that the siding looks weathered or the color is dated.
As you’ll quickly discover, replacing the siding is very expensive. Painting the siding is economical and will modernize your home, add curb appeal, and increase your property value.
Discolored Sections
You’ll quickly discover that replacing a few areas of siding is not easy when it comes to color matching. Unless you have the leftover siding used on your home, the new siding will be close but will never be an exact match.
In this instance, painting the new siding with paint that matches your existing siding color is a possibility.
Home Additions
Let’s say you’re adding a covered deck to your home, and the siding will be visible within the new area. If the color doesn’t coincide with your designs, painting it is an excellent remedy.
Buying a Home
If you’re considering purchasing a property where the siding is weathered or faded, painting is viable. You can even use this knowledge as a bartering tool when negotiating prices.
Preparation Before Painting
The most time-consuming and perhaps intimidating aspect of painting siding is the preparation. It is laborious, especially if you’re doing the project yourself.
As tempting as it may be to cut corners on cleaning and prepping, don’t do it. A great paint job begins with the proper preparation of the surface.
Cleaning by Hand
If you have a small area to paint or pressure washing isn’t an option, then you’ll need to clean by hand. Here’s a list of what you’ll need:
- Rubber gloves. There is a variety to choose from, especially if you’re allergic to latex. Whichever you choose, get the type that extends over the wrist, so the cleaners won’t drip down into your gloved hands.
- Plastic bucket. A one-gallon bucket will suffice.
- TSP. TSP, or trisodium phosphate, is an inexpensive cleaner that will cut through grease and grime. You can also try Krud Kutter and skip the bucket and water process since you can spray and wash directly.
- Bleach. Only use if the siding has signs of mildew or mold.
- Scouring pads. We recommend using something like Scotch-Brite scrubbing pad. Models with a plastic handle will make the work less tiresome.
How to mix:
- Add 3/4 gallon of warm water to your plastic bucket.
- Add 1 cup of TSP and 1 cup of bleach (if needed) to the water. Mix well.
- Wearing your rubber gloves, immerse your scouring pad into the cleaning solution.
- Scrub, scrub, scrub! Start high and work your way down.
Pressure Washer
The fastest method to cleaning the siding is to use a pressure washer. Make sure you use a moderate nozzle tip (black or white) and not one with a smaller spray pattern (green, yellow, red).
If the siding is above ground level, you will need a ladder. Depending on your expertise and comfort level, you may need to sub this out to a professional cleaning company.
Some pressure washers allow you to insert a cleaner into the system. Here are some products to consider:
- Bleach. By far the cheapest option, it can irritate the skin and eyes. You’ll want to use a diluted mixture of 50% water with 50% bleach.
- Krud Kutter. Look for their House & Siding product that’s designed for use with a pressure washer. This cleaner works very well and isn’t as harsh on the skin as bleach. Be sure to follow the manufacturer’s directions.
Orbital Sander
Another option is using an orbital sander. Traditional sanders move in an up and back motion and could mar the siding.
An orbital sander leaves fewer marks because it moves in a circular motion. Make sure you wear safety glasses to protect your eyes.
Whichever cleaning process you use, always start high and work your way down the siding. When using an extension ladder, be very careful.
You’ll have one hand on the ladder while the other scrubs or sprays or sands. Toss in an extension cord or pressure washer hose, and it’s a lot to contend with on a ladder.
If you wash by hand or use a pressure washer, allow the siding to dry for 24-hours before moving to the next phase. If you used an orbital sander, you could prime that day if you wish.
Priming Aluminum Siding
There are so many primers to choose from that it can be intimidating. The keyword to remember when shopping for primers is adhesion. Look for an exterior primer with these qualities:
- Latex. Sure, you can get an oil product, but why mess with the fumes, the cleanup, and the toxicity? Today’s latex primers will do everything an oil can with faster dry-time, low VOC, and water cleanup.
- Multi-surface application. Ensure you read the manufacturer’s label or ask a store clerk if the primer will adhere to aluminum siding. Don’t “go cheap” and grab an inexpensive primer that may peel or chip down the road.
In no particular order, here are some primers to investigate:
- Kilz Adhesion
- Fresh Start Multi-Purpose Latex Primer by Benjamin Moore
- Extreme Bond Primer by Sherwin Williams. If you’re budget-minded, look into their Multi-Purpose Latex Primer.
Also, if your top coat will be a darker hue, have the paint store tint the primer to that color. It may save you doing a third coat!
When you’re ready to apply the primer, you can spray, brush, or roll. Here are tips for each.
Primer Spraying
Whether you use a professional sprayer or a DIY handheld, make sure you read the manufacturer’s recommendations. For instance, you may need to thin the primer for spraying to be effective. Check on temperature rating, too.
Be sure you:
- Tape off windows and other areas you don’t want to prime.
- Cover bushes, cars, driveways with tarps or plastic. You don’t want your neighbor calling you about the new “paint job” on his car! Remember: over spray can drift a long way.
- Use smooth, consistent motion; don’t over spray an area, or drips will form.
Primer Brushing
Brushing is self-explanatory, so I’ll dispense with too much Captain Obvious. If you choose this application, use at least a 3” brush to make painting efficient. Soft bristles will apply the primer smoothly and leave fewer brush marks.
Using a Roll
You’ll be surprised how fast the primer goes on with this method! You can use a conventional 9” frame with a 1/4-1/2 inch nap or opt for a 6” roller and nap.
The latter is easier to work with, especially if you’re on a ladder. With practice and technique, you’ll learn to work the primer into various nooks and crannies without using a brush.
Painting Aluminum Siding (Top Coat)
Now that the siding has been cleaned and primed, you’re ready to apply the topcoat. You use any of the three application methods I mentioned for priming.
When it comes to what paint to use, any top-tier exterior paint will do the job. Regarding which sheen to purchase, this is a personal choice.
With today’s modern paints, even a quality flat will endure as long as a low-luster. Bear in mind that the shinier a paint is, the more you’ll see defects and design details of the siding.
Whichever product you end up choosing, don’t fall for the “one coat cover” guarantee.
Yes, these paints will cover with one coat concerning color. However, to get the paint to live up to its ratings and longevity, you’ll need to apply two coats.
Here are two products to consider:
1) Regal by Benjamin Moore. If you want the best paint, then this is the one. Prices will vary by region, but typically, a gallon of Regal exterior retails for around $70.
Yes, it’s expensive, but it outperforms any other products on the market. As the adage goes, “You get what you pay for.”
Regal comes in three sheens:
- Flat
- Low-lustre
- Soft gloss
2) Resilience by Sherwin-Williams. Sherwin-Williams has a wide selection of exterior paints, but this one stands out. It is recommended for aluminum or vinyl siding and can be applied when temperatures are 35°. Resilience comes in three sheens:
- Flat
- Satin
- Gloss
Resilience sells for around $77 a gallon, but Sherwin-Williams often runs sales, so keep your eyes open for deals. You can also ask your local Sherwin-Williams for a contractor price.
Regarding longevity, the answer is difficult to nail down. Every region of the world has unique weather patterns that will impact a paint’s durability. With that all said, plan on your paint lasting between five and ten years.
Whether you’re a pro or a homeowner, following these steps will ensure your paint job is stunning and will last a long time.
Related Posts
- Benefits of Installing Outdoor Blinds in Your Home
- Different Types of Brickmould Materials: Homeowner Guide
- 11 Black Front Door Ideas – Elegant Exterior Doors (Concept Designs)
- 15 Main Pros and Cons of PVC Decking – Comparison and Discussion
- 12 Different Types of Wood for Outdoor Furniture with Pros/Cons
- 11 Different Types of Natural Stone for House Exterior
Leave a Reply