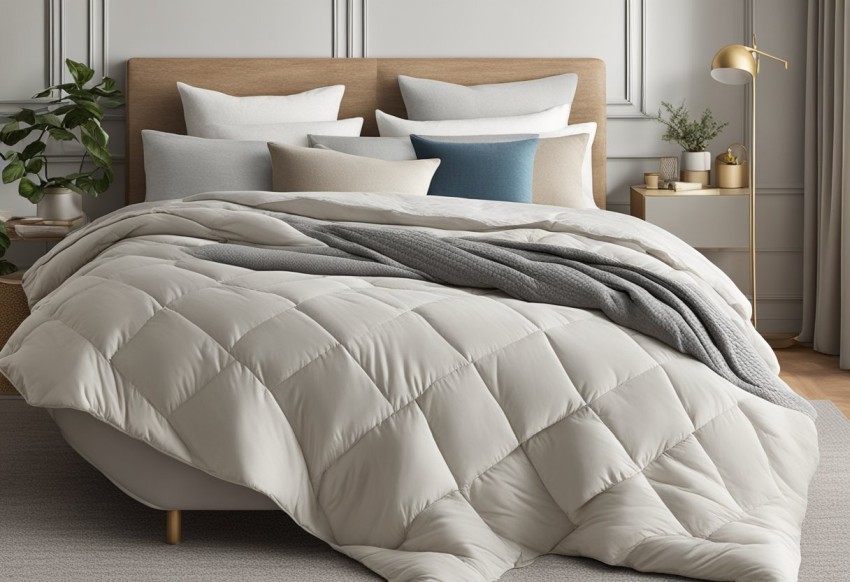
When considering updating your bedding, you might find yourself trying to distinguish between a duvet, a quilt, and a blanket. Each offers different levels of warmth and style, and understanding these can be key to making your sleep space both comfortable and appealing. Duvet A duvet typically involves a two-piece set that includes an insert […]
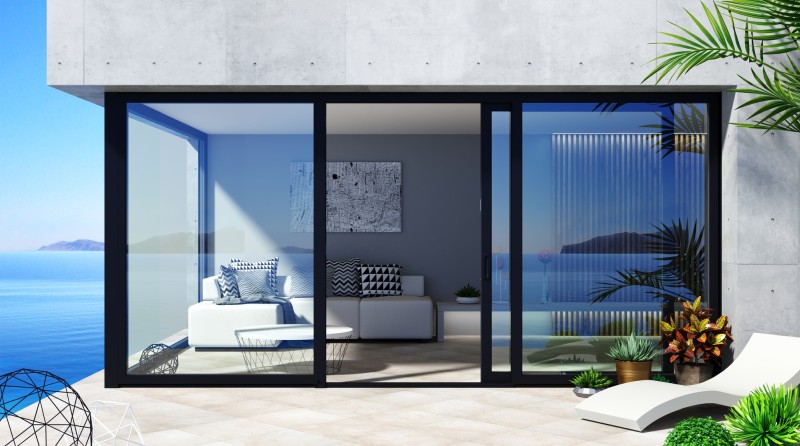
How to Protect Sliding Glass Doors from Burglars: Essential Security Tips

Sliding glass doors offer convenience and aesthetic appeal to your home, allowing natural light and unobstructed views of your outside space. However, these features can also present security risks, making them a favored point of entry for burglars. The large panes of glass and the sliding mechanism, which can be less secure than traditional doors, […]
How Long Do Sliding Glass Doors Last? Durability and Lifespan Explained
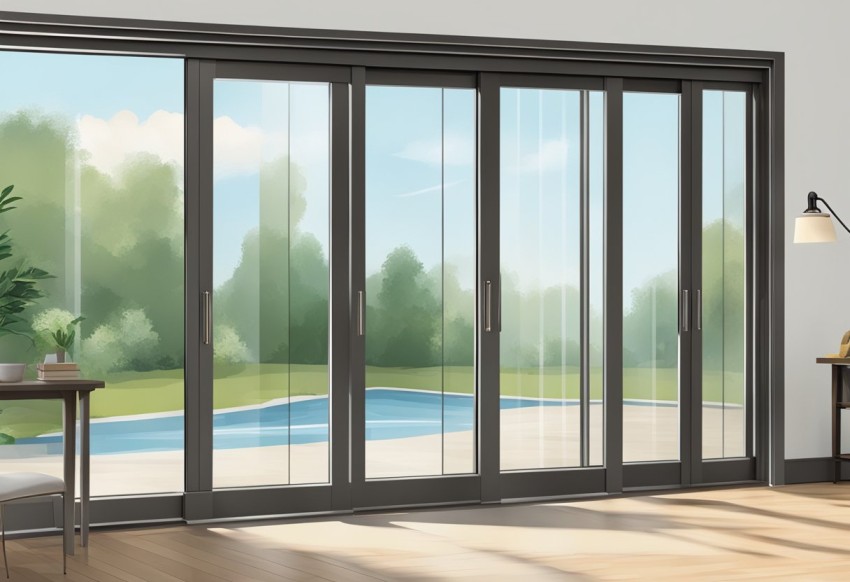
Sliding glass doors are a popular choice for many homeowners due to their aesthetic appeal and functionality. These doors let in natural light, provide easy access to outdoor areas, and can enhance the overall design of your home. The lifespan of sliding glass doors typically ranges between 20 to 30 years, depending on factors such […]
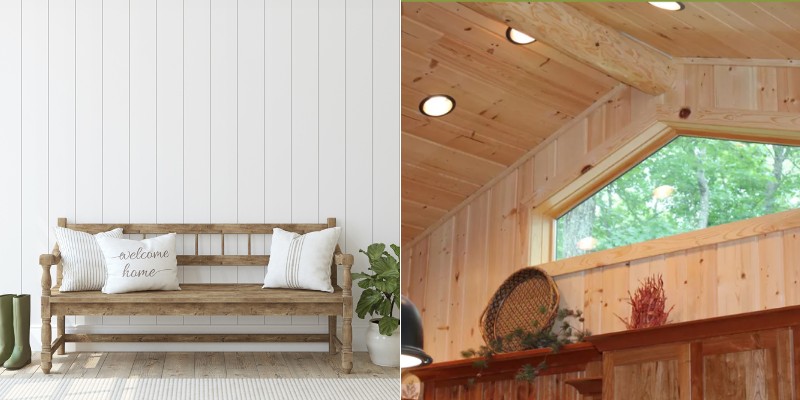
Here Are Some Pros and Cons of Textured Walls in Homes
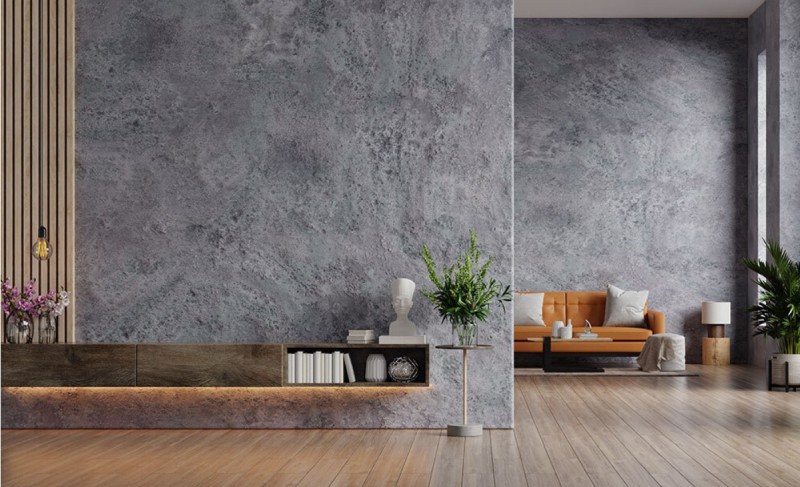
Textured walls have become increasingly popular in home design as they add depth and visual interest to a space. However, like any design element, there are pros and cons to consider before deciding to incorporate textured walls into your home. In this article, we will explore the advantages and disadvantages of textured walls, helping you […]
How to Stop Sliding Doors from Rattling – Causes and Solutions
Sliding doors are a popular choice for many homes and offices, providing a smooth and seamless transition between spaces. However, a common issue that can arise with these doors is an annoying rattling sound. This noise can be particularly bothersome if your doors are exposed to wind or if you frequently close other doors nearby. […]
Why Do Sliding Doors Get Stuck? Common Causes and Solutions
Sliding doors can be a convenient and stylish addition to your home or office, but over time, they might become difficult to open or close. There are several reasons why sliding doors get stuck, creating a frustrating experience for anyone trying to move through the space. Understanding these causes can help you better maintain your […]
Divvy Homes Rent-to-Own Program Explained (with Pros and Cons)

Owning a home is a dream that many people aspire to achieve. However, for Individuals with less than perfect credit or a non-traditional job/business situation, obtaining a home loan can be a challenging task. This is where rent-to-own program, Divvy Homes, steps in. This program aims to make home ownership accessible to everyone, regardless of […]
Pros and Cons of Electric Blankets and Safety Guide
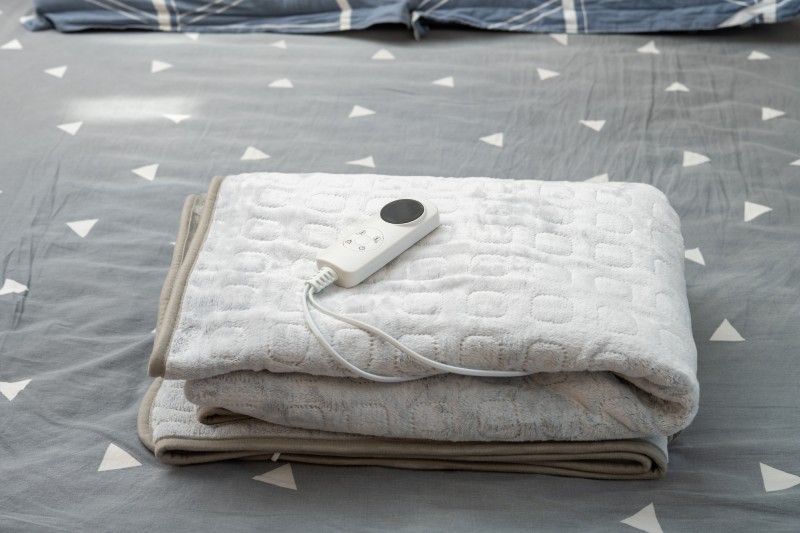
Electric blankets are a popular choice for those looking to stay warm and cozy during the colder months. However, it’s crucial to prioritize safety when using these electrical items. In this blog post, we will discuss the main pros and cons of this blanket type and also safety precautions to keep in mind when using […]
Advantages and Disadvantages of Rent-to-Own a House

Are you dreaming of owning a home but struggling to qualify for a mortgage or save up for a down payment? Don’t worry, there might be another option for you – rent-to-own. In this blog post, we will delve into the pros and cons of this non-traditional approach to homeownership, and discuss who would be […]
Cheap Ways to Heat a Room – Efficient and Budget-Friendly Solutions
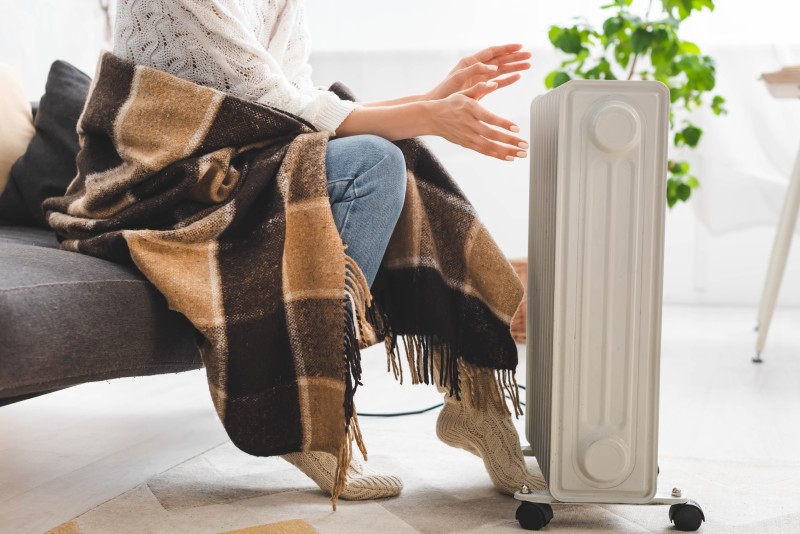
As the colder months approach, you might be looking for affordable ways to keep your home warm and cozy. Thankfully, there are several cheap options available to heat a room without breaking the bank. In this article, we’ll explore a few budget-friendly methods that can be used to maintain a comfortable temperature in your living […]
11 Ways to Get Rid of Cooking Smells in a Small Apartment or House

Doesn’t food smell enticing when you’re cooking? If you’re absorbed in creating a luscious meal, your mouth waters at the thought of eating it. Still, heating and frying food releases odorous gases into the air. So, a few hours later, those delightful scents get stale, lingering. If you have compact living quarters, the odors are […]
Comparison of Murphy Bed vs Sleeper Sofa For Your Home
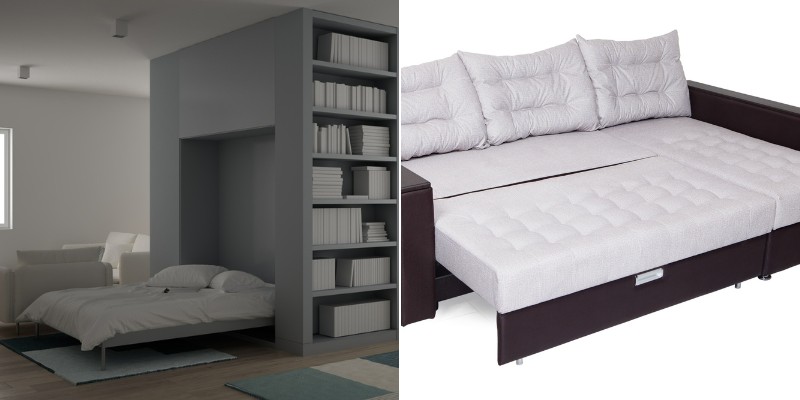
When you need to conserve space in your home, Murphy beds and sleeper sofas are clever options. They’re also convenient and fun to use. Still, they vary markedly in design, assembly, and cost. This post will help you decide which type of furniture suits your room layouts and needs. What is a Murphy Bed? A […]
Comparison of Knockdown Drywall Texture vs Orange Peel
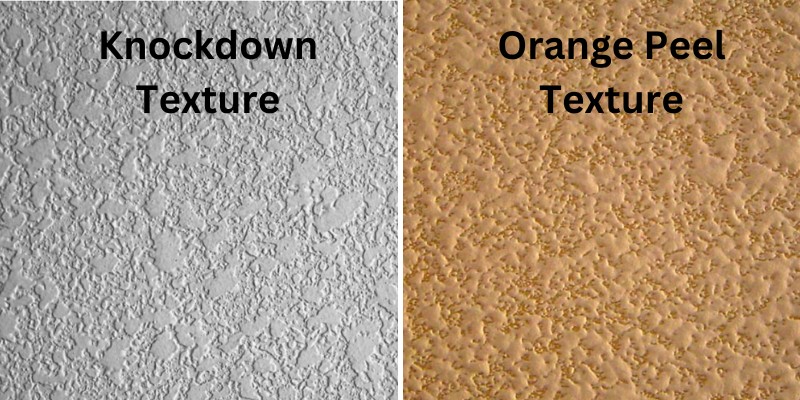
Texturing walls can enhance them beautifully! While you can pick from 15 texture styles, knockdown and orange peel are trending now. Plus, they’re a breeze to apply. Here I compare knockdown and orange peel drywall textures regarding their: appearance application methods durability ease of cleaning noise reduction successful repair costs I also answer questions you […]
11 Stores and Sites Like IKEA For Affordable Furniture and Home Products
With countless furniture stores available, shopping can feel like a daunting task. Ideally, you want high-quality items at reasonable prices, and you’d like to find them efficiently. Yet, you don’t want to spend considerable time researching the options. I’m eager to streamline the process for you. All the following retailers sell furniture online, some of […]
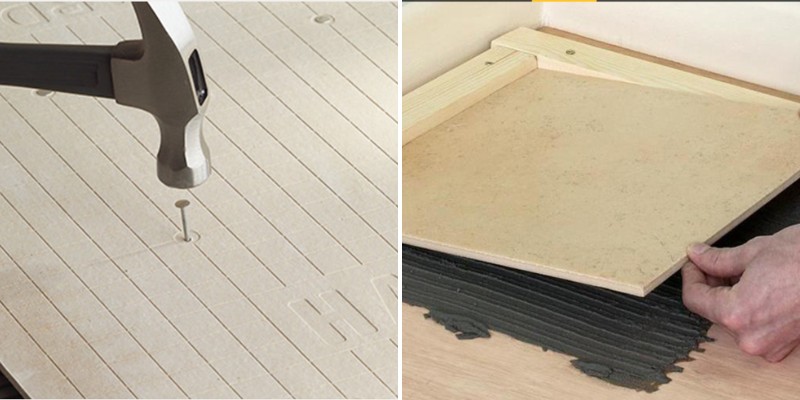
Comparison of HardieBacker Cement Board vs Plywood For Tiling Projects
I applaud your ambition to undertake a home improvement tiling job! Self-installation on floors and walls requires patience, skill, and experience. Moreover, a successful outcome hinges on picking a suitable tile underlayment. Two possible options for tile substrate are cement board and plywood. Each one has distinct properties to consider, including: durability moisture resistance load-bearing […]
Comparison of Corian Countertops vs Laminate for Kitchens
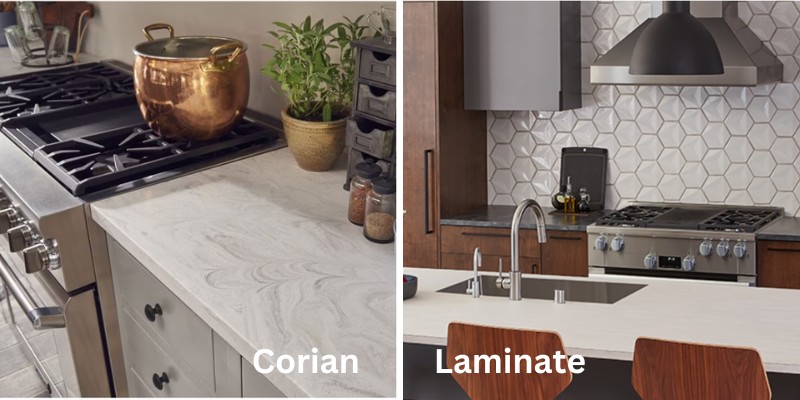
Both Corian and high pressure laminate are worthy options for your new kitchen countertop. Still, each product has distinct advantages over the other. Here I compare Corian to laminate on their performance and aesthetics. You’ll discover which material has more durability, longevity, and design options. You’ll also learn which one is most affordable and […]
Comparison of Shiplap vs “Tongue and Groove” vs Beadboard Wall Paneling
You’re eager to upgrade your walls with paneling! For starters, you’re fascinated by photos of the various types. Now, you’re debating which one is best for your project. Here I share the pros and cons of shiplap, tongue and groove, and beadboard wall coverings. For instance, you’ll learn about their respective: durability moisture resistance installation […]
All About Fragranite Kitchen Sinks With Pros & Cons
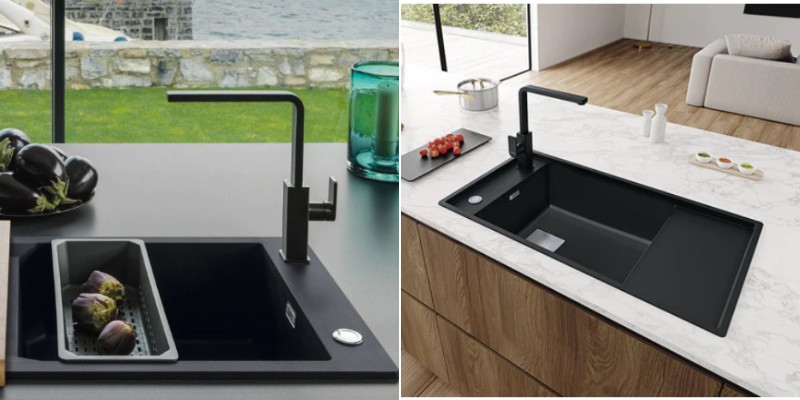
Imagine a sink material that repels germs, stains, and scratches! A durable fixture with a subtle shine that’s easy to clean. These are some of the wonderful traits of a fragranite kitchen sink. Source Here you’ll learn everything about fragranite kitchen sinks, their pros and cons etc. You’ll also find average price ranges for single […]
What Type of Plywood is used for Roofing? Size and Thickness Guide
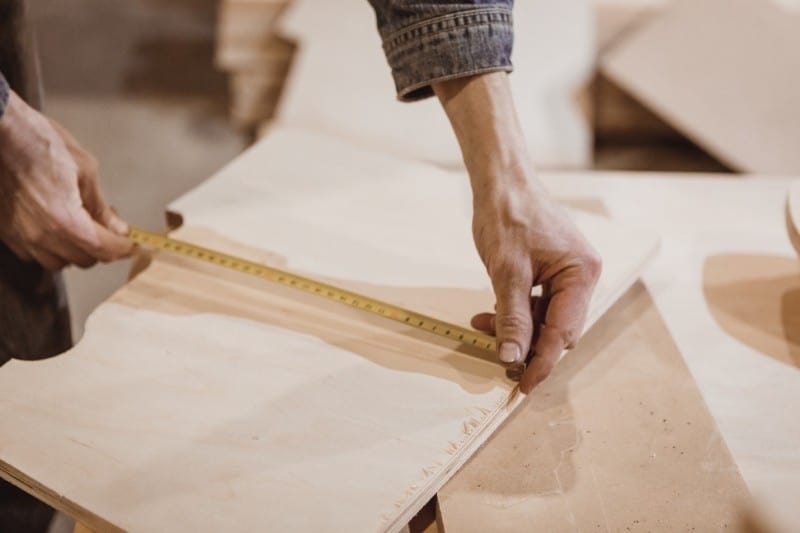
A roofing system consists of a variety of materials and parts, which are interconnected to protect the inside of your house from harsh weather conditions and elements. The materials used may vary, depending on the location of the building to the shape of the roof and even the surrounding climate. The materials can range anywhere […]
All About Polypropylene – Olefin Fabric Sofa Material
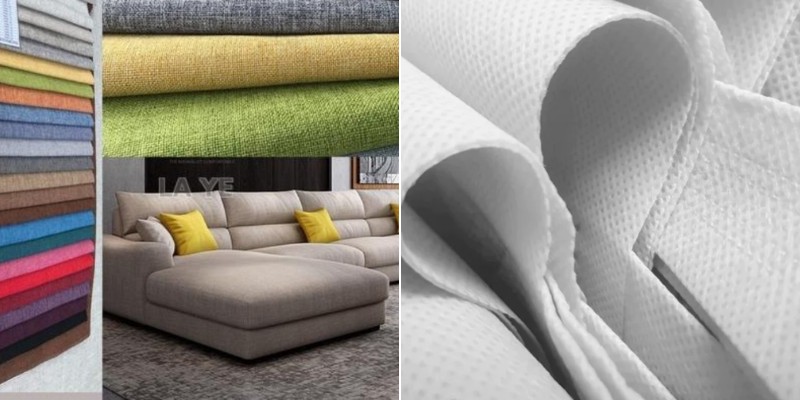
Have you been couch-shopping lately? If so, you’ve likely seen that many sofas are upholstered in polypropylene. Also called olefin, this synthetic material appeals to many homeowners for both indoor and outdoor sofas. Here I discuss the benefits and drawbacks of polypropylene sofa material, along with several Frequently Asked Questions that people have about this […]
Comparison of Granite Composite Sink vs Stainless Steel
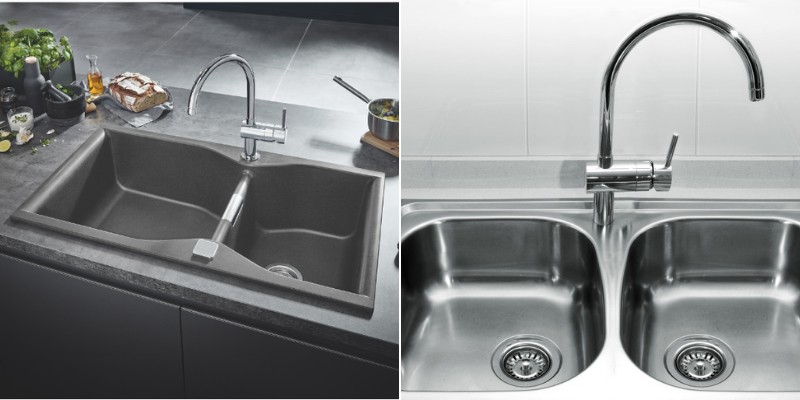
You’ve whittled down your kitchen sink choices to granite composite and stainless steel. Now, you’re debating which kind to choose. You like the looks of both colored stone and gleaming steel. Yet, you wonder which type of fixture will serve you best. I’d like to help you decide. In this post, I compare the pros […]
15 Main Pros and Cons of PVC Decking – Comparison and Discussion
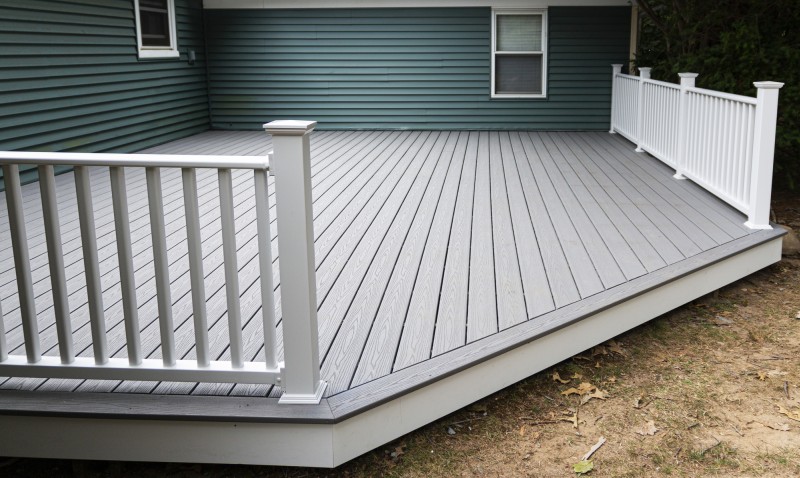
In this article we’ll describe and discuss the pros and cons of PVC Decking for your home, so keep reading to find all the details below. If you’ve an interest in the origins of PVC decking materials, even your favorite search engine could confuse you when you try to learn more about this popular option. […]
6 Different Types of Soil for Gardening – How to Identify and Improve Each Type

You’re anticipating a great growing season with abundant blooms and yields! It helps to know the type of soil prevailing in your garden. This way, you can tailor its condition to the needs of the plants you wish to grow. Lately, readers have asked how to identify their soil type. So, in this post, I […]
6 Great Alternatives to HardieBacker Cement Board
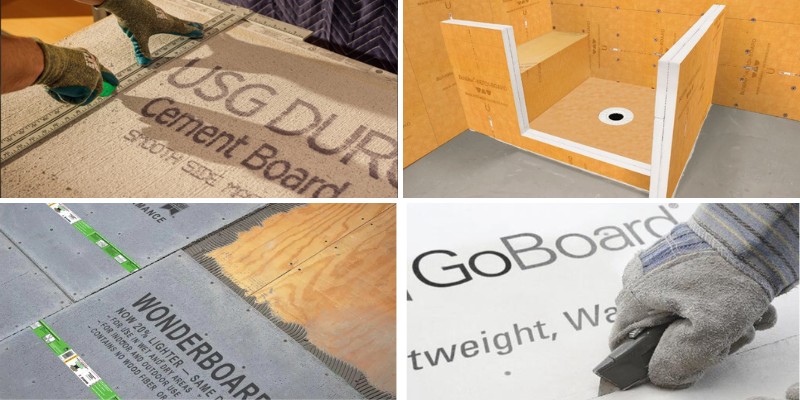
Although Hardie Backer board is a very good choice for tile jobs, there are people looking for alternatives to HardiBacker for many reasons (cost, availability, ease-of-installation etc). In this article we will discuss and describe 6 very good alternative products that you can use for your project. Hardie Backer Board is a Portland cement and […]
Landscaping with Rocks vs Mulch with Pros and Cons
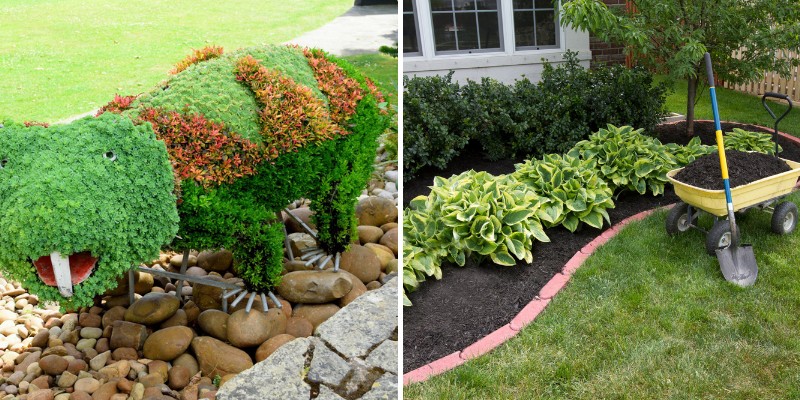
You’ve got exciting goals for your landscaping project this year! You’re picturing thriving plants and tidy borders. Meanwhile, you’re pondering whether to choose decorative rocks or mulch. Here you’ll learn the landscaping materials that foster vibrant plants and conditioned soil. Certain products excel at curbing pests, weeds, and soil erosion. Others need minimal upkeep. I […]
Comparison of WonderBoard vs GoBoard Used as Tile Backer Boards
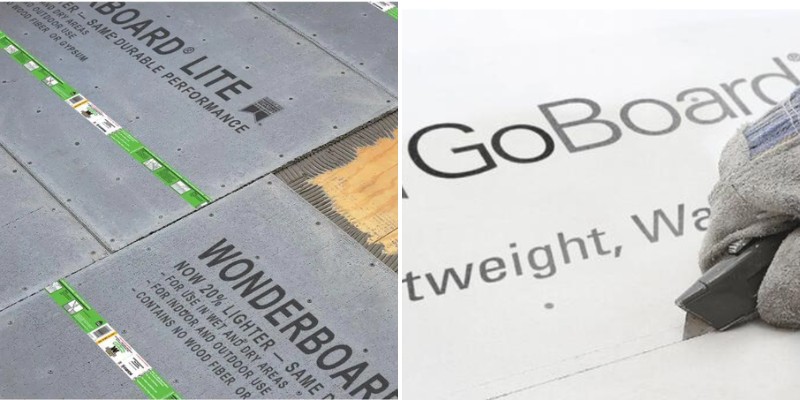
Two popular backer board brands are WonderBoard and GoBoard that can be used for various applications in the construction and home industry, such as for tiles, walls, ceilings, showers, flooring etc. In this article we’ll compare Wonderboard vs Goboard and describe some of their characteristics and use-cases for each one. Tile backer boards are substrate […]
Comparison of Manufactured vs Modular Homes with Pros/Cons
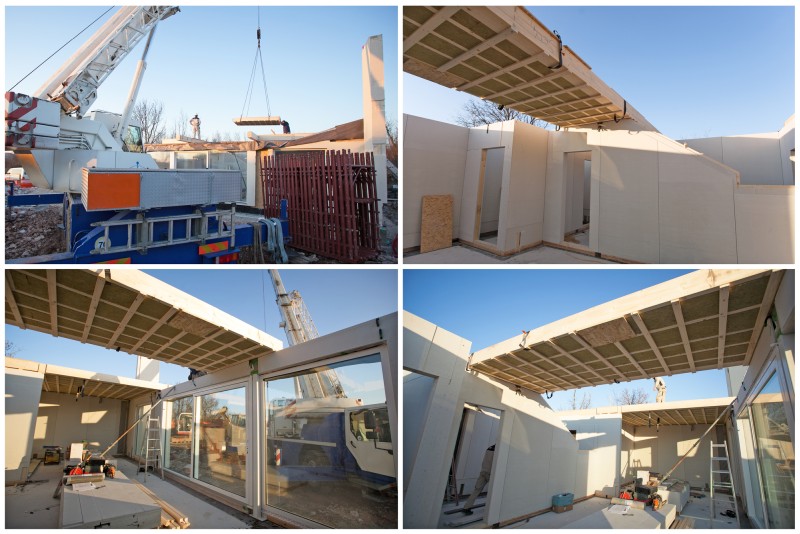
How thrilling that you’re planning a new construction! Among your options are manufactured, modular, and traditional or “site-built” homes. Here I answer questions and concerns about manufactured vs modular houses, such as their construction, designs, and safety, together with the pros and cons of each type. I also provide a cost comparison per square foot. […]
12 Different Types of Wood for Outdoor Furniture with Pros/Cons
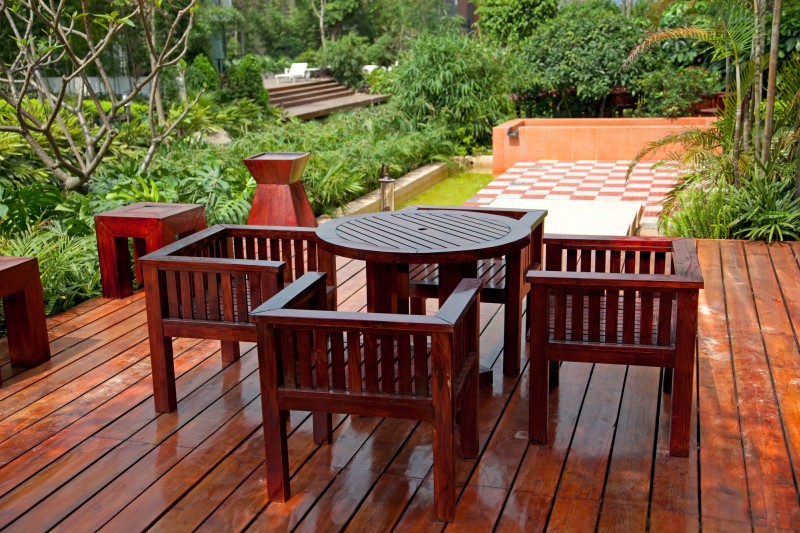
Comfy outdoor furniture can turn your backyard into a restful haven. Many homeowners prefer the warm, exquisite ambiance of wood. There are two main categories, hardwoods and softwoods. Here you’ll learn about twelve types of wood in both classifications, including their pros and cons. I also answer frequently asked questions, such as “What’s the most […]
20 Exterior House Design Software and Visualizer Apps (Free&Paid)
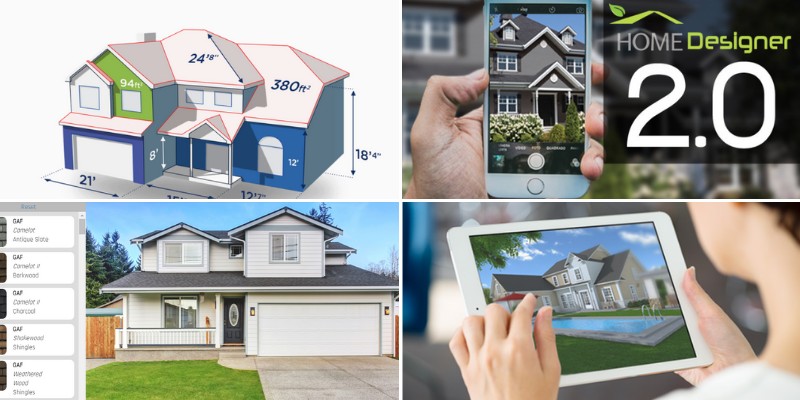
Exterior house design software continues to grow in popularity these days. Ordinary homeowners and professional builders alike utilize this type of software to visualize how a construction or remodeling job will look. In simple terms, these tools allow the user to create an exterior home design project and get a feeling of how their final […]
Some FAQ (Frequently Asked Questions) About Wall Paneling for Homes
Recently, many of you have sent me inquiries about wall paneling. For instance, some homeowners ask if wall cladding is costly, durable, or easily installed. Others want to know if it’s suitable for bathroom walls and backsplashes. Here, I speak to all your questions on wall coverings. The answers will leave you smiling, eager to […]
What Color Wall Paint Goes With Brown Furniture – Some Design Ideas
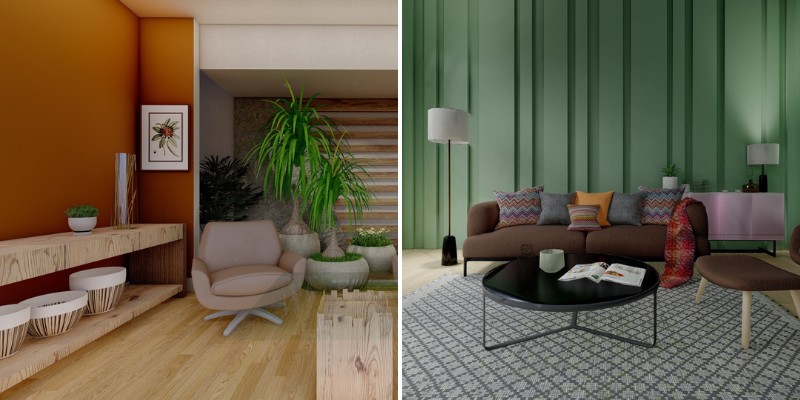
A darker and wear resistant color like brown is a popular choice for fabric upholstery for any area of the home. Brown in all its shades and hues exudes a sense of comfortable warmth, contributing to an inviting and cozy atmosphere for your interior space. While brown can sometimes be perceived as a dull color, […]
10 Different Types of Glass for Home Windows (With Pros and Cons)
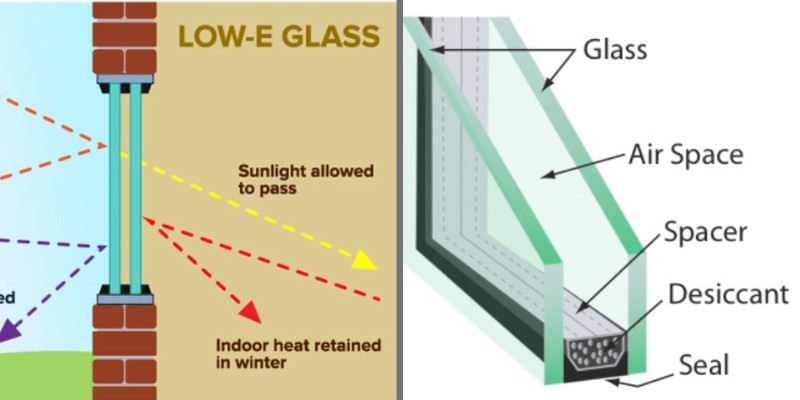
Are you troubled by what it costs to heat and cool your home? Are you concerned about sun damage to your furnishings? Perhaps you have young kids, worried they could be injured if a window were to break. Or maybe you’re in a region prone to hurricanes. In all these cases, installing high-quality windows can […]
Different Types of Finishes That Make Concrete Floors Aesthetically Appealing
In the past, a lot of interior designers and homeowners were limited by the available concrete floor finishings on the market. Apart from common gray concrete finishes, there weren’t many choices available back then. Nowadays, you can now choose from several types of finishes aside from concrete floors. With this wide option, the aesthetics that […]
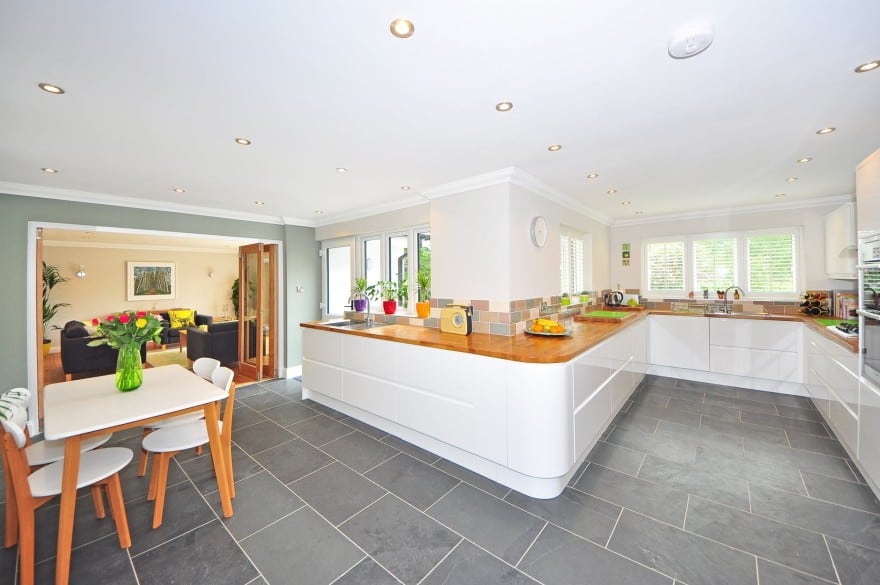
How Much Does it Cost to Paint Kitchen Cabinets?
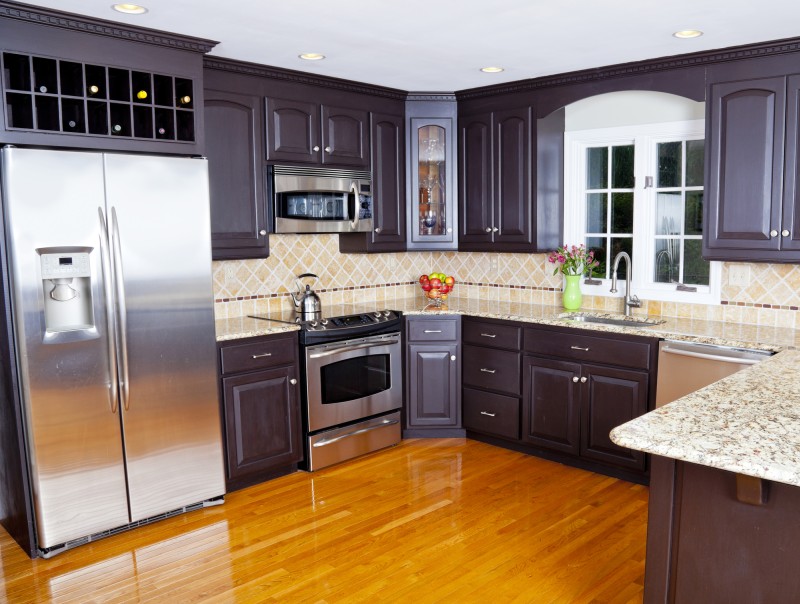
The kitchen is one of the most important spaces in any house or apartment. Not only do you use it to prepare food, but it’s also often a place to gather friends and family. As a result, you want your kitchen to look good as new. However, daily cooking can put your kitchen under a […]
11 Different Types of Natural Stone for House Exterior
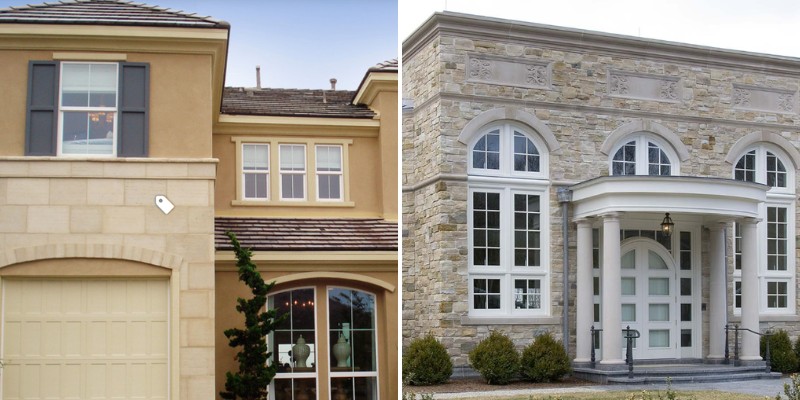
Home shoppers may not mean to do so, but many judge a house’s merits based on solely on its exterior. It’s human nature. “A well-designed exterior can increase your property value by up to 20%,” say real estate experts and while landscaping plays a part in whether shoppers tour a home’s interiors, compelling exteriors contribute […]
10 Main Pros and Cons of Acid Stained Concrete Floors
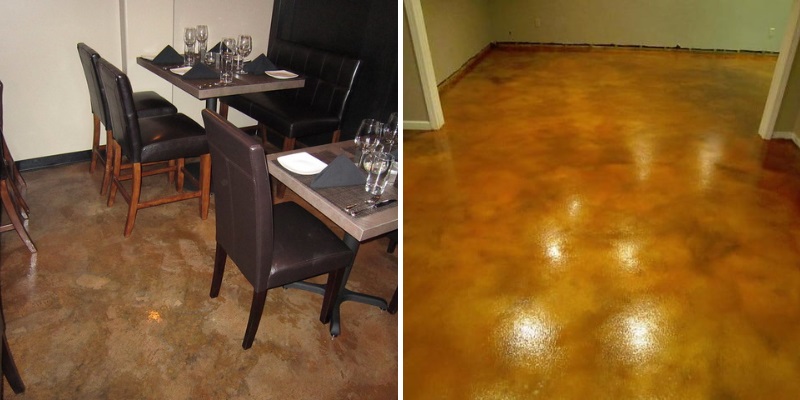
Acid staining a concrete floor is a unique process that applies color and a rich sheen to the surface of the concrete. It is not opaque like masonry paint or epoxy sealer that coats the concrete. The acid stain is actually absorbed into the concrete because concrete is naturally porous. The result is a translucent […]
What Color Furniture Goes With Hardwood Floors – Design Ideas with Photos
Hardwood floors have always remained a popular and well-loved choice of material for floor finishes. The texture and natural wood color, polished to perfection, adds a timeless charm to any interior space. The longevity, and durability under constant wear that hardwood flooring has demonstrated has cemented it as one of the most reliable options for […]
Best Paint Colors for Nursery Rooms – Design Ideas with Photos
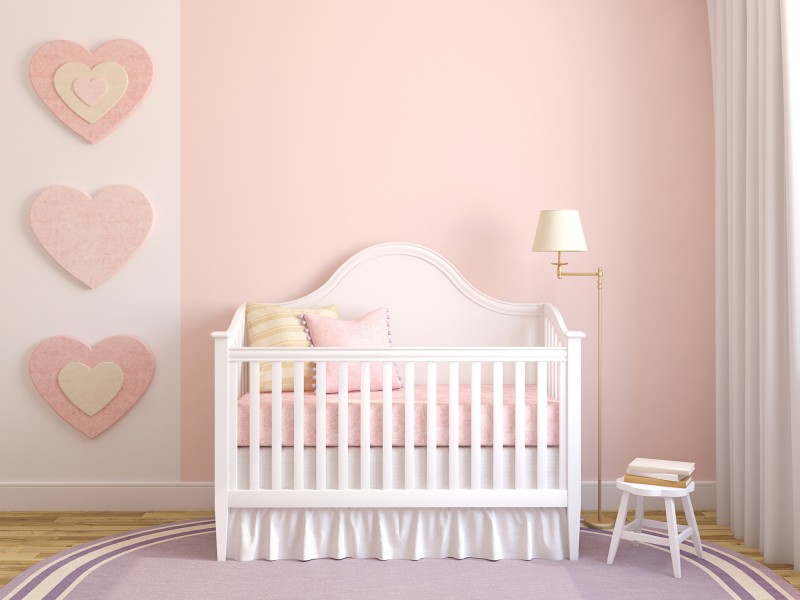
Picking up the right nursery paint color for your little one is no piece of cake. Colors, as we all know, have a psychological effect on our well-being. Different colors depict different emotions and suit different spaces. A nursery is a space where you and your little one will spend most of your time therefore […]
How Much Does it Cost to Furnish a House – Living Room,Bedroom,Kitchen etc
Have you recently closed on the perfect home? Maybe you’ve already moved in, brimming with happiness. I join you in celebrating this huge achievement! Now, you’re debating how to furnish your house without overspending. Here you’ll find average costs to outfit your main living quarters. Specifically, you’ll see estimates to furnish and decorate your whole […]
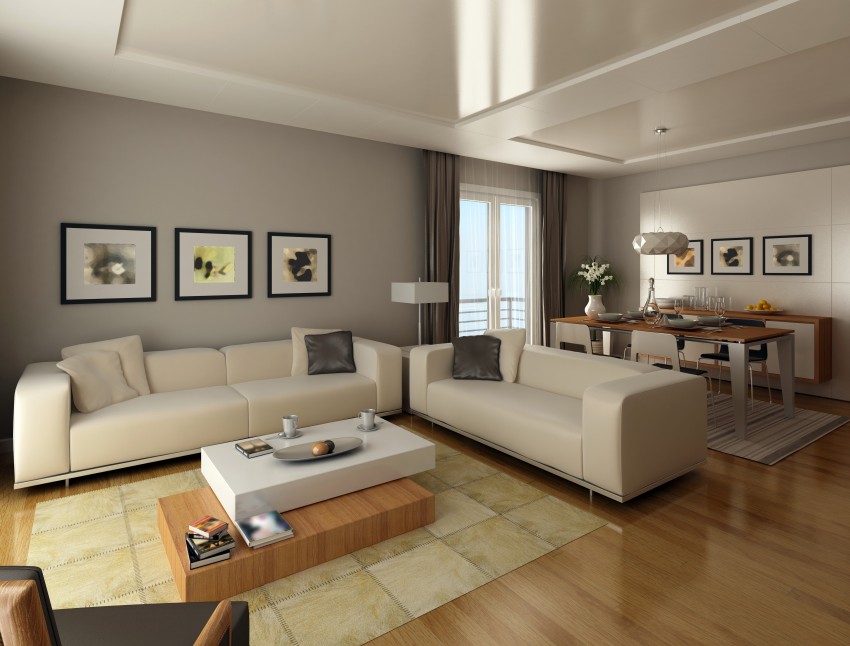
What Color Sofa Goes With White Walls – Design Ideas With Photos

In terms of choice of paint colors for walls of interior spaces, white has always been a classic favorite. White and its variations can serve as a neutral backdrop for the furniture and fittings to stand out against. A humble color, white helps any color set against it shine as an object of visual focus, […]
Advantages and Disadvantages of Composite Decking for Homes
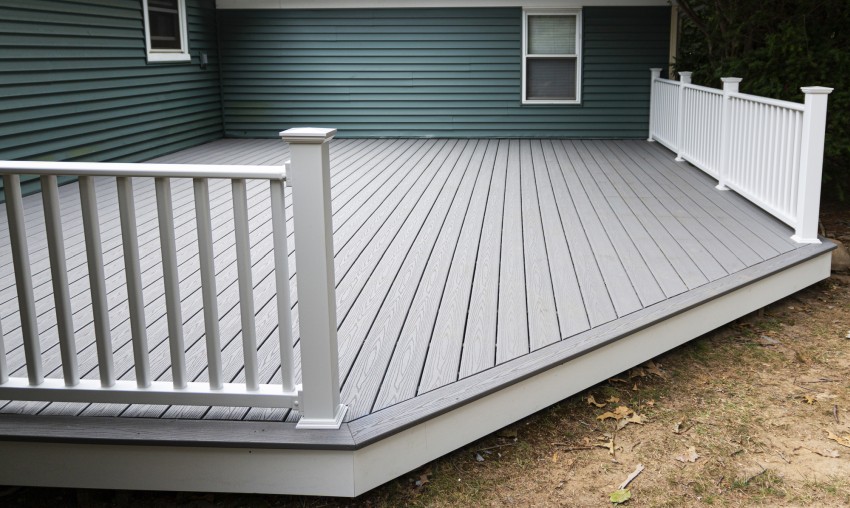
Composite decking has been around for some time and it is becoming more popular as an alternative to wood for your outdoor deck, porch, or walkway. This product often has the appearance of wood planks but it is made of a combination of natural and synthetic materials. Most composite deck boards are fabricated using wood […]
What Color Siding Goes With Red Brick? Design Ideas With Pictures
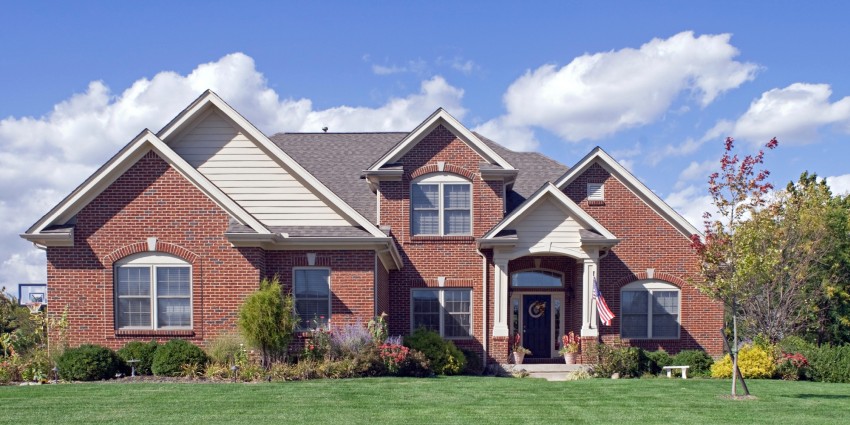
Whether you’re going for a style that reads modern or a more classic feel, red bricks are always in vogue, and homes built with them are sure to stand the test of time. On its own, red brick make for an exceptional exterior, but there are times when adding the smooth horizontal lines of siding-whether […]
What Color Furniture Goes With Gray Walls – Design Ideas With Photos
Opting for gray interior walls is a design approach that a lot of us gravitate towards when it comes to making our spaces more versatile. A mix between black and white, gray walls can be the puzzle piece that helps to create a myriad of interior looks and bring all the design elements together. In fact, […]
What Color Granite Goes With Maple Wood Kitchen Cabinets?
For your whole kitchen or just a small space, charming warm-toned maple cabinets are a beautiful feature in today’s home. Offering a variety of styles, ranging from lightly stained color to golden honey tone to a darker finish, this strong, resilient wood can set the tone for the look and feel of any interior space. Finding the […]
What Color Granite Goes With White Cabinets – Some Design Ideas
The design of your kitchen interior is centered around a number of focal points: the cabinets, the countertops, and the floor and wall finishes. These work together to create the overarching theme of the kitchen and set the tone for the aesthetic of the space. An ever-favorite choice for the color of kitchen cabinets is […]
Here Are The Main Pros and Cons of a Barndominium House

Are you in the exciting planning stage of building a new house? Would you like it to be in a rural town, exuding country charm? Inside, do you picture a roomy layout? If so, a barndominium can fulfill your vision! Its novel style has been gaining ground with home builders since 2016. That year, barndominium […]
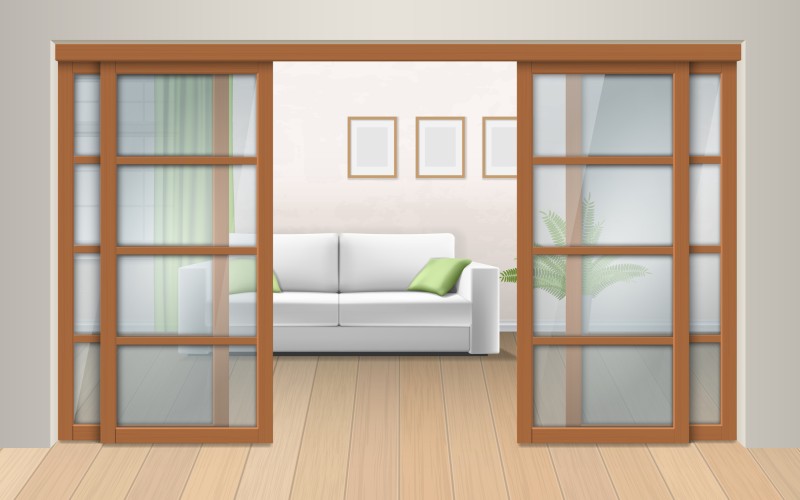
Different Types of Doors for Closets – Design Ideas with Pictures
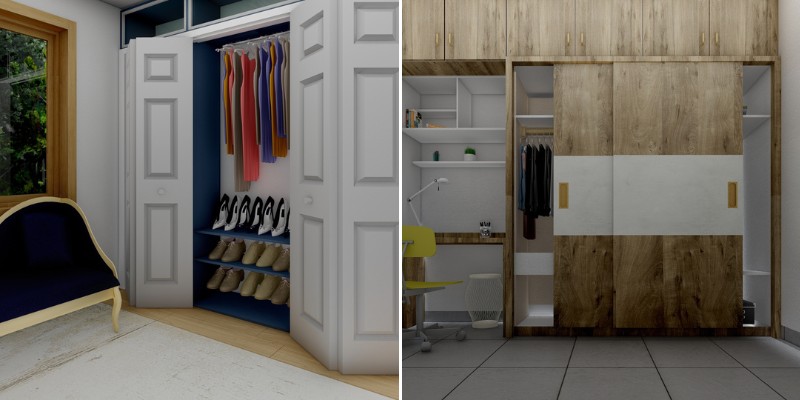
For any residential interior, storage is essential, in whatever form available. Anything from under-stair storage, to attics, to basements, to closets, are essential for storing your belonging and live in a tidy interior. With a world of options available, the selection of doors for closets can be a matter of concern. Everyone wants to arrive […]
Advantages and Disadvantages of Peel and Stick Backsplash Tiles
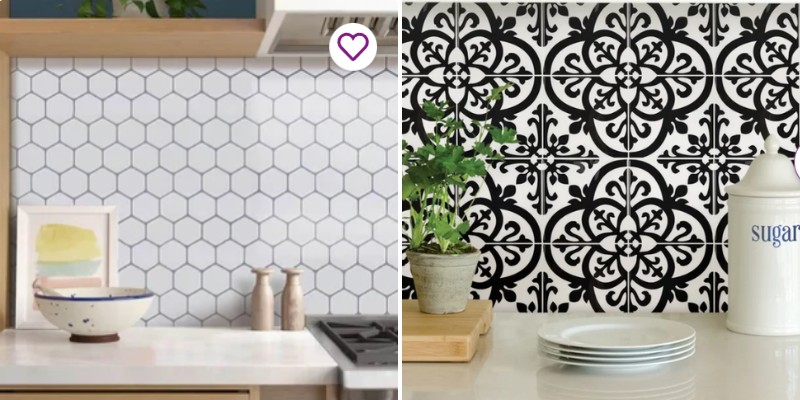
When you think about it, the backsplash in a kitchen is likely what your eyes will see first when you enter the space. It is practically at eye level and is the common thread or band that separates the countertop from the upper cabinets, tying everything together. Backsplashes are also popular in home bars, bathrooms, […]
Best Wall Color for White Floors – Here are Some Design Ideas
Color harmony is a very important element that interior designers consider when planning out a space. Colors are correlated to many factors such as lighting, furniture, size and function of the space etc. The right coordination helps to determine the success of the interior scheme. The main elements in a space such as walls and […]
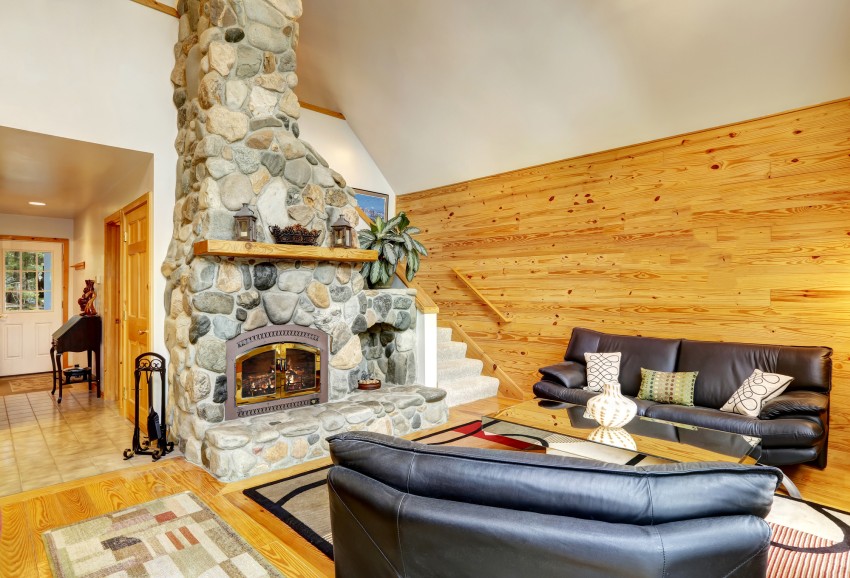
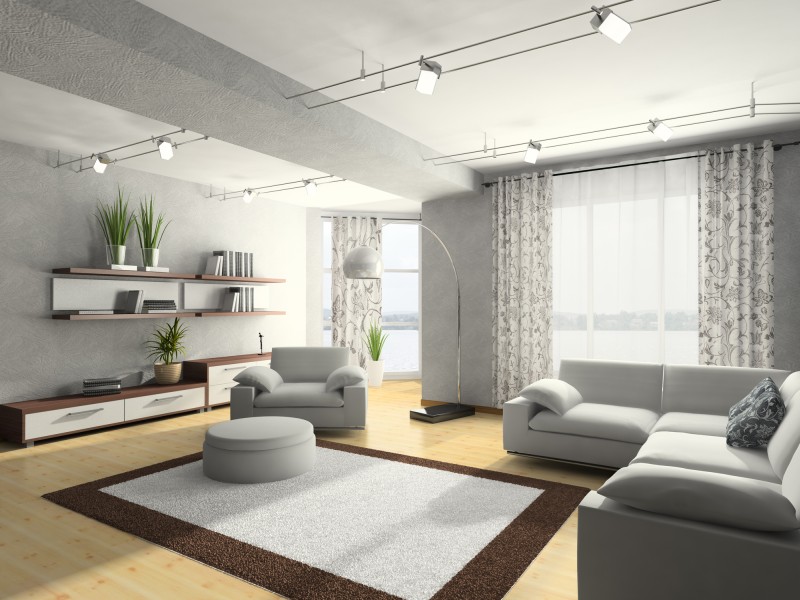
How to Hide a Pillar in Your Living Room – Design Ideas with Photos
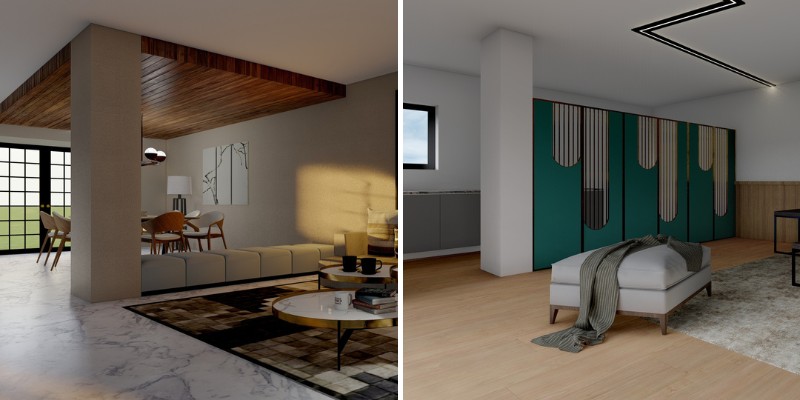
In any residential interior, the living room ends up being the heart of the home. It is the space where inhabitants spend the most amount of time and it ends up serving as a backdrop to a bulk of their lives. With this knowledge, it is always the living room that is most carefully and […]
- 1
- 2
- 3
- …
- 17
- Next Page »