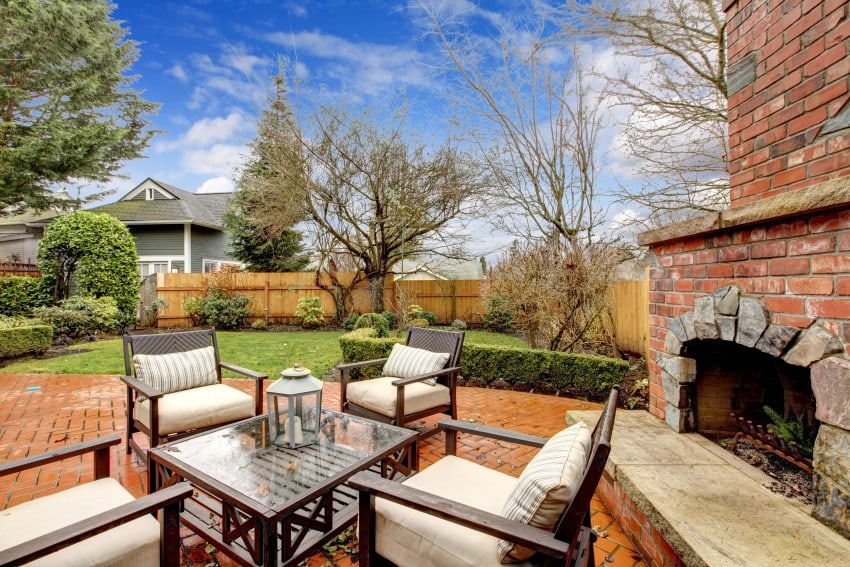
If you love spending time with your family or friends in the backyard or garden of your home, then this article will give you some nice DIY backyard project ideas and designs to improve your home exterior.
Moreover, a study by the University of Michigan found that consumers value a landscaped home 11.3 percent higher than the same home without good landscaping and good backyard design. So, improving your backyard with some inexpensive and clever DIY projects will enhance also the valuation of your property.
Let’s start with a video with general tips for creating your DIY backyard paradise in your home.
Some Tips for a DIY Backyard Paradise
In the following video, Allen Lyle from http://www.todayshomeowner.com/ gives us some interesting and simple tips when constructing some DIY projects in your backyard. He covers topics such as using pavers for building a patio or fireplace, how to put down a patio and what kind of crushed rock you should use as a base, best types of mowers to use for the garden etc.
Video Source: https://www.youtube.com/watch?v=UlU_w0caeMA
Video Transcription
Hi everyone, it’s Allen Lyle with the today’s home owners television show. I’m here to give you some tips today on creating your own patio paradise.
- Location, where do you want to put it? It can be right outside your back door, it might be on the end of an existing deck, maybe on the far corner of the grass, it doesn’t matter where you put it, that’s up to you, but if you’re starting from scratch, here’s my recommendation for you, use pavers. Pavers are easy to work with and you can build more than just a patio with it, here we’ve got a patio, we’ve built this beautiful planter boxes, we even created this gigantic outdoor fireplace all from pavers and you really have to just pay attention to the diagrams, the schematics that you get from your paver company, well we did all these; we put it down one layer at a time and used some construction things to bind them together, no motor at all involved in putting this all together.
- However if you’re putting down a patio, here are some recommendations for you; you do need to excavate some of the dirt out of there, because you want to start with a good solid base, do not go with crushed rock; a lot of people just do a paver not a crush rock, but a paver like this. This actually, it may seem like a good solid base, but it doesn’t bind well, so what I would recommend is going with a crushed limestone instead, this makes a great base; pack it down very well, 2, 3 inches, minimum really 3 inches.
- On top of that you’re going to put some sand down and once you’ve got the sand in place you’re just ready to put down your pavers, any random pattern will work, you really can’t mess it up, just make it look nice regardless of how you put it down.
- If you’ve got an existing concrete slab, some things that you can do, take a circular saw, put a carbide thick blade on it, use a 2 x 4 as a straight A and you can actually cut this shallow grooves in the concrete, create maybe a diamond pattern, that looks great and then come back with the stain or paint. If you’re going with the stain I do recommend using a translucent stain instead of a solid, and what I really don’t like paints or solid stains, I like the translucent, because the beauty of concrete will shine through.
- If you’re going to place anything on top of the slab, that’s a great way to upgrade, you can use the pavers that we talked about already, bricks, you can use natural stone, you can use a tile, I would go with a porcelain instead of ceramic, because porcelain just holds up to the element a little better. However outdoor slabs don’t ever have moisture barriers put down under them, so you do want to make sure you put a moisture barrier on top of the slab. Normally you just paint this on maybe two coach, and what that does is provide moisture barrier so moisture doesn’t migrate through the slab and then affect the integrity of what you put on top of it.
- Always use a polymer modified mortar to set in these stones, and if you do actually true stone, you want to seal that and really you need to seal that maybe once a year, you could get by every other year, but my choice is to seal it at least once a year.
- Finally when you’re thinking about a paradise outside, well think about the less work the better, and choose your lawn mowers that will work for you. Self-propelled mowers; I like them, but if you can get an all-wheel drive that also has a system that allows you to work at your own pace; even better. 4 wheel drive means that all the drives means any train will work well, if you want to use the bag, you can, I personally like to use a recycler mower, because I can recycle the clippings right into my lawns and feed the grass at the same time.
If you like me and you need a little bit of help with whatever you do, we’ve got thousands of videos and articles online at http://www.todayshomeowner.com/all designed to help you have the best looking house on the block.
How to Build a Raised Garden Bed
The following video from Lowe’s Home Improvement shows a simple backyard project to construct a raised garden bed using cider wood. The box size of the bed is 3×5 feet and you can use 2×4 and 4×4 posts at the corners. In the garden bed you should pour at least 6 inches of soil for having enough room for plant roots to grow. Add some fertilizer or compose in the soil and place the plants in the soil. Below the garden box bed you should lay a piece of landscape fabric over the area.
Video Source: https://www.youtube.com/watch?v=B--i7Cv8ffA
Video Transcription:
You don’t need an elaborate garden to enjoy fresh vegetables and colorful flowers, consider installing a raised garden bed. All you need are few materials and small space and a few hours to complete this simple project. We’re going to build another bed that match these beds, the size are going to be 2 x 4 with 4 x 4 post at the corners. This is a basic container, but you can build your garden bed from almost anything including stone, concrete, blocks or even just a pile of soil, you can even construct a raised bed as part of the day, now whatever method you use, just make sure that you have at least 6 inches of soil for the plant roots to grow, and if you’re planting vegetables; do not use treated woods.
In some readings you can use standard lumber, but we’re using cider, because it resists decay, and it looks great;
- The first thing to do is to select a location, you want to spot where there is plenty of sun and it helps to have access to both sides of the bed. If you build your bed next to your house or a fence, you might need to make it smaller so you can reach the far side of the bed.
- Once you have your location, mark the dimensions of the container on the ground and remove the soil, you don’t have to dig too deep, just enough to remove the grass. Now it’s probably a good idea to check the ground with the level making any adjustments as needed, and this is easier before the box is in place.
- Then lay landscape fabric over the area, roll out enough so that it’s just a little larger than the planning bed. Okay now let’s start building the box. For larger bed, you may have to anchor the post to the ground, our bed is small so we won’t have to do that, it’s going to be 3 x 5 feet, but you build yours to a size that’s best for you.
- Cut the 2 x 4s and 4 x 4 post to length, draw pile of holes into the ends of the 2 x 4s, now secure the 2 x 4s to the 4 x 4s, making sure it’s flush with the top of the post, and even on square on the sides.
- Attach the 2 x 4s with screws and secure the post on the other end this same way.
- Now do the same thing for the other side of the box.
- Then add the 2 x 4s to the ends.
- The box is constructed so that we can set it in place, make sure it’s leveled.
- And when it is set, cut the excess landscape fabric.
- Now fill the container with soil, if you have a compose pile, mix some into the soil, you can also add special fertilizers.
- Now we can add our plants, just pull the dirt back, put the plant in place and pack the soil around the roots.
- The next step of this project is the irrigation plan; a sucker hose will get water to the roots efficiently, just lay it along the roll of plants and cover with soil. You can add a timer to the sucker hose to automatically water your plants for you, and now your raised garden bed is complete.
It’s a simple project that will give you years of enjoyment. For other outdoor projects including water wise landscaping, visit lowes.com/videos.
How to build an outdoor sectional (sofa/couch) using 2×4 boards
In this backyard DIY project, Ana White has built a sectional sofa in her outdoor deck using just 2×4 wood boards. It turned out to be a sturdy and solid couch with minimal expenses. Ana offers the plans of the sectional in her website so you can visit and download the plans if you want.
Video Source: https://www.youtube.com/watch?v=6liMOuSGZ5g
Video Transcription:
Hi guys, how are you today? Mother’s Day was just a couple of weeks ago, and my family asked me what I would like to do for Mother’s Day and I can think of nothing that I would rather be doing than building a project.
So this is what I came up with, this project is all 2 x 4s, there is nothing else besides 2 x 4s, I used a seated 2 x 4, but if you were to add a finishing just bring your 2 x 4 as well.
It’s actually two different projects, this is full couch so if you just want a couch, an outdoor couch you can just build this and it will stand alone on its own, and then this project here is actually a one side armless sectional of pieces, we bring the two pieces together and make a beautiful sectional.
I love this project so much, because it just feels so solid, this is just so nice, so comfortable and so sturdy and it gives that rich handmade look. I feel like when I’m out on this deck and it’s hot out, I feel like I’m on vacation at some expensive resort with high-end real world furniture.
The cost of this project is expensive for me, so I spent a couple of hundred dollars on the 2 x 4s, it may be cheaper for you where you live. The cushions were the real expensive part and again I live in Alaska so I have a really limited shopping options and nobody shows up here, the cushions did cost me quite a bit, but I urge you to shop around; these are 25 x 25 inch cushions and you can use like 24 x 24 as well. So shop around, and maybe wait for a sale and you can make your own as well. So anyways enough talk, let’s get started and I’ll show you how I built this sectional.
In this video I’m just going to show you how I made this sectional piece that pulls up a plan that is available in real view. To make this sectional piece, you’ll just build some seat framing, this is a simple box for some supports, and then for the arm you’ll take two legs at the top and the center support and then another center support on edge, we’ll use that bottom center support to tie it to the seat framing at the back and the front leg and then tie in the back board, and I added some extra boards underneath the back armrest on the side armrest for extra support, and then just deck it, super simple.
I cut all of my boards first to quench the colors which you can get in the description or on my blog, I used a compound layers on to make it easy. Then I just started by creating the seat framing just using ¾ quarter inch screws per corner, using self-tapping screws and they are going really well, you can notice I’m using actually a 12 volt drill, that’s all I had since over other drills at the cabin and it was fine I didn’t even need the quick drill, I’m adding the seat framing supports in the center, I’m leaving about 22 inch space in between, that’s plenty since we’re going put one and half inch stick board on top, and again just screw those in place.
So once I got this sit framing done, and I just put it aside then on to the arms. The arms are really simple I just screw them together again all ¾ quarter inch screws. This entire project is all 2 x 4s and all ¾ quarter inch screws, with one arm done and the seat framing done, I can just tie in the bottom support arm with the side of the seat framing ¾ quarter screws and I’ll do the same with a single leg for the back, I’m being very careful to make sure that I draw line there and make sure that I’m meeting up the line.
Okay, so now I can flip it over and it’s really starting to look like a sectional piece here, super exciting. The front single leg is really short and I cut it and just line it up to the top there and clamp it to the frame, so just clamp it in place and I’ve attached it there with four ¾ quarter inch screws. Okay so now for the back, on one side of the back I had to use pocket holes to attach because they are edge to edge, so I drill the pocket holes, the one with the one and half inch 04:43 and using two and half inch pocket hole screws here. Those are the only pocket holes you’ll need to do in this project, but you can make the whole project with pocket holes as well, I’m going to then add a two more screws on the top of the arm rest to tie the back legs, so let’s see if it fits.
I already made the other sofa, I made that first and here is just the sectional piece, it fits, I was so excited at this point, and it was just turning out so well and such a simple back project. So the decking, it’s just 2 x 4s again and I’m spacing the an inch and half apart, you can use a scrap piece of 2 x 4 has a spacer to help you guide you on why this space should be far back when it was cut back an inch and half for that back leg. And then I’m just using one ¾ quarter inch self-tapping screws to secure the seat board to the seat framing.
I also added that back support piece and it just kind of makes that back a little stronger. Okay so we are all down with this sectional, and I’m putting these cushions on a 25 x 25 so they will just go right on top and they fit nicely 24 x 24 will probably work a little better if you see it over here, but I think there is some room for flexibility and of course this plan is extremely easy to customize, so if you’ve had cushions already you could easily adjust the size of this plan and make exactly how you want, that’s the cool thing about DIY. Anyway it’s your turn now, you can do something random and build and hopefully I’ve been helpful to you, but it’s your turn now, so go and build and make sure you share, because I want to see how yours turns out as well.
DIY Small Patio Makeover on a budget
Lauren Petroff, a House & Home Assistant Design Editor describes in this video how she improved her outdoor small patio inexpensively. She transformed a dull and small patio into a functional and stylish place to sit and dine outside.
Video Source: https://www.youtube.com/watch?v=ZOldqkUwhVY
Video Transcription:
Not too long ago December started and I thought it was the best time to get my patio in order. Just a few weeks ago it was criteria, it lacked function and color and style. What I did like about this place originally was that it had a great foundation with new interlocking and already authentic place, what I didn’t like was that there was really nowhere to dine, there were no trees no color and I just wanted to inject a little bit of personality and function into this place.
When it came to the layout, it was a really small space, so there are a few things that I had to take into consideration; namely I had a BBQ and I had an air-conditioning unit that was definitely staying where it was. Once I had my lead in place it was a little bit of work, but it definitely all came together really well.
I started this project by tackling a need for a little bit of architectural interest, I created a lot of panel and also a cover for the AC unit, I then painted the premium outdoor stain, I chose a really nice dark blue, which I think ties in really nicely with the greenery. The latest work beside the house actually hides the basement window which I didn’t want to see from the patio. And I decided to paint the divider to create a focal point and tie into the ladder’s panel.
The existing fence I have in a natural wood, because I like the look of the natural wood, and I thought it would be too dark it I painted it all black. The thing about ladders is that it’s a really inexpensive option, but it is definitely tricky to paint, so I would suggest using one of those small kinds of rollers. I actually decided to build the bench myself for this space, it also has storage. I like the fact that I elongated it a little bit and it’s a really big, so it also access a lounging area, it’s great because I can use it to sit back and read, but it’s also the right height to be used at the dining table.
This dining set is from PC home, it’s a great value and I absolutely love how sleek and contemporary it is, there is a glass top, black frame and the chair just tuck in really nicely. Previously there is a two person table here which was incredibly inefficient, I wanted to be able to have full dining set, so this is great because I can easily have six people sitting down to dinner here. As a back door to the dining area, I decided to use a wall of cedars which are great low maintenance inexpensive option. All these plants are from PC land and garden, so they are really affordable. The one area in this back patio I just worked on is the cushions an fabric, I chose the green, blue and gray fabrics from Robert Holland’s new Collection and I just had to have the public upon of living deals, they also did such a great job of all the selling.
I think this patio will be easy to maintain, quick to set-up and easy to put away. I’m really happy with how this back patio turned out. It came together in a few weeks and on a pretty tight budget, I’m really excited to get out here and start using it.
Building an Outdoor Privacy Screen
Lowe’s Home Improvement video tutorials are incredible and very practical. This is one of them which demonstrates the construction of a privacy screen to add privacy to your backyard garden. The screens are constructed with cider wood, 2×6 and 2×4 boards for the posts and wooden frame.
Video Source: https://www.youtube.com/watch?v=ZiTI6TtRBpE
Video Transcription:
Are you feeling a little exposed, well adding privacy to your backyard garden is easy as building some simple screens, this is a really versatile design you can build in various types to achieve a clean and stylish look like this. Get started by laying out all your supplies, I love that lows that will cut the lumber to size for you; you can download the supply list along with the step-by-step instructions for this project at www.lowescreativeideas.com.
This screen gets built from the inside out, so we’re going to start with the interior frame. Once her inner frame is built, they get detached to the outer post with screws. The post are just two 2 x 6s with a 2 x 4. This is a great time to stop and make sure that everything is screwed up, so before you attach the interior frame to your post, you’re going to want to use these framing square and just make sure that you got everything all lined up right.
Remember when you’re screwing on to the end of narrow pieces, you’ll want to draw a pile of holes to prevent splitting, now you can finish putting in the rest of the horizontal rails.
Now it’s time to add a little flash to your screen, make sure you are wearing gloves when you do this, the flash is sharp and you don’t want to cut yourself, just use a simple over under weaving technique like you’re weaving a basket and attach it to the inside face of the post with sheet metal screws.
So the final step in your screen assembly is adding your last two 2 x 6 post, the great thing about cider is you can either use it natural or you can stain it.
Before you ever dig, you should call your local utility locating service to check the area, when one is severing new services, we should probably take measures.
Spend a little time thinking about the layout of screens, you want to position them to get the maximum amount of privacy, but you also want the layout to make sense in relation to your house.
Once you’ve marked the spot you can start digging, the depth of the holes will depend on the code in your areas so check with your local building officials.
Depending on your soil, you may want to rent an auger to get the job done more efficiently. To prep the holes, place some gravel in the bottom for drainage, then place the legs of the screen into the holes, this is not a one person job, so get some help.
Make sure that it’s level on the top as well as front to back, and then you’re going to use quick sand concrete to secure the screens.
So when you’re mixing it up you’re going to want to do it consistently like peanut butter, you can always add more to get some, you’re going to hit some boils, but that’s just all part of mixing it up.
If you need to make adjustments to keep it level, don’t worry the concrete doesn’t stick immediately so you can still make slight adjustments if you need to.
These screens have so much privacy; it feels intimate and cozy without feeling walled off. I also love it they are great from both sides.
So whether you’re out in your area enjoying the patio they look fantastic.
Related Posts
- 15 Main Pros and Cons of PVC Decking – Comparison and Discussion
- 12 Different Types of Wood for Outdoor Furniture with Pros/Cons
- 11 Different Types of Natural Stone for House Exterior
- Advantages and Disadvantages of Composite Decking for Homes
- What Color Siding Goes With Red Brick? Design Ideas With Pictures
- 8 Unique Porch Ceiling Ideas for your Home (with Photos)
Leave a Reply